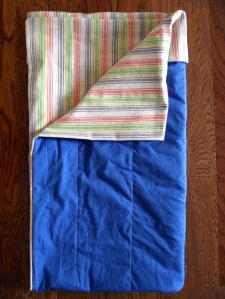
This project was born out of (1) laziness; and (2) unnecessary fabric acquisition. It is perfect if you have trouble measuring and find yourself with two extra yards of whatever and some big fat scraps.
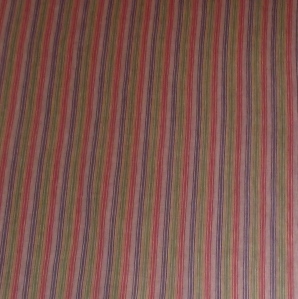
Mine started when I took a trip to the Philadelphia Resource Exchange in search of silk to line an overly ambitious coat I’ve been working on (I found it, and am almost done; more later). I also found this fabric, and bought it without a specific project in mind. Dumb.
That was followed by a trip around the internet, where I found these Purl Bee tutorials.
Dear lord, blankets without bindings. I’m so glad someone thought of this and put it on the internet. Mine is a bit of a modification of their two tutorials. It also might be useful to ask the internet to show you pictures of kantha quilts and keep those in mind — often no batting! Just layers of fabric. This is what we’re doing.
In addition to the stripey fabric, my scraps were:
3 yards of blue organic cotton, because I apparently don’t add or subtract properly; several very wide 12 to 18 inch remnants from cutting the bottom off of our red ikea curtains to make them fit. (Those curtains are in the post here. I had dreams of making a pouf with the scraps, but let’s be serious.)
So.
1. Gather your fabrics. You should have at least three layers to give the blanket some weight.
1.2. Wash material. (Sorry, aint nothing get in the way of quick craft satisfaction like having to take two hours to wash and dry your fabric.)
2. Layer your fabrics on top of each other and square them up. If any of our material requires piecing, squaring the larger fabrics together will give you the proper picutre of how you should do that. I thought I would have to sew five fat strips of red curtain fabric, but once I layered and squared my large pieces, I realized I only needed four. One less seam=win.
2.3. If necessary, piece together your piecing fabric. Iron open your seams. Also annoying, I know, but don’t skip.
3. Lay top fabric right side up. Lay backing fabric on top of this, right side down. Lay middle fabric or fabrics on top of the backing fabric.
4. Smooth, trimming any excess at sides, and pin.
5. Sew all around, leaving a four-inch wide gap at the bottom.
6. Trim across corners in the seam allowance.
7. Flip that shiz outside out! Use a dull pencil, the butt end of a pen, whatever, to poke your corners out. Press those outer seams. (Again, sorry.) .
8. Using a blind stitch or slip stitch, sew the gap closed.
9. Decide how far apart you want your verticle quilting lines. Mark regular intervals. If you love yourself, use these pins to mark said intervals. If you want a kantha-looking blanket, now is the time to hand stitch. If you’d like a more basic and/or faster one, run that thing through the sewing machine. I cheated: I just followed the yellow stripe instead of measuring with my beige thread. You don’t see the quilting from the front. Definitely visible from the back though.
Then give that shiz to your momma for her birthday.


