


1. Measure yourself! Superfun, right? You’ll need the circumference of your waist or hips, wherever you want the skirt to hit; your hips at the apex of your ass (I’ll look up the proper sewer term for this some day I promise); and the length from the floor to waist/hipbones/whatever measured at the back (it takes length for the fabric to go over your butt). Also helpful: distance between waist and ass apex circumference along your side and an approximation of your stride length. Take a very large step that is larger than a step you would normally take. Measure distance between your two feet
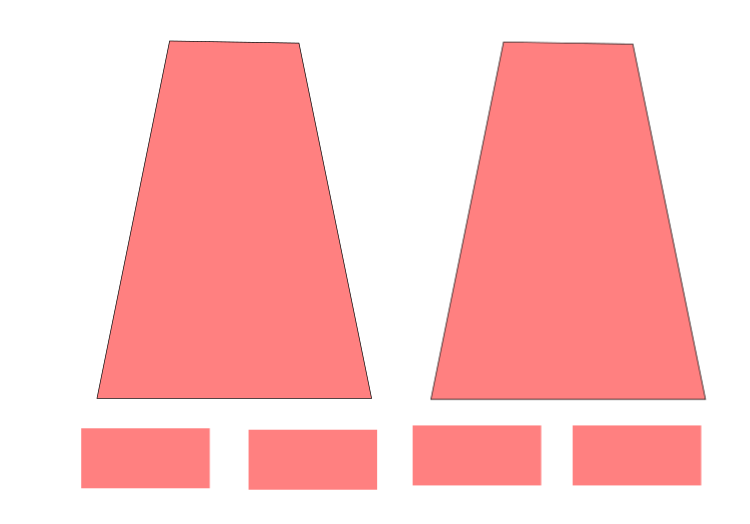
2. Draw yourself a little picture of your pieces so you think this through real hard before messing with your fabric. You will have four pieces: a trapezoid shaped skirt front, a trapezoid-shaped skirt back and four waist band pieces that are all rectangles of equal size.

Skirt piece: (1/2 waist measurement plus seam allowance) x (waist-to-floor length plus seam allowance) x (stride length plus some).
Use 1/2 inch seam allowances for your sanity in making this very basic pattern**.
Par example:my waist at my hip bones is 33″, my ass apex (let’s use AA so I can stop writing ass and don’t have to use some diminutive) is 37″, my hip bone to floor length is 36″, and my stride plus some is 30.
With halving and then adding seam allowances for the circumferential measures that’s 17.5, 19.5, 7 , 36, and 30.
So! Draw a little mock up with some notes on it. Use graph paper if you’ve got it because then you can scale it and omg see any mistakes early.
The AA is a double check so you don’t wind up with a skirt that is too tight in there. You might have to make a slightly wonky trapezoid to give yourself the room in there. In my drawing above, the red side seam represents what happens when I draw a straight line from the waist to the stride end points. The black side seam is re-angled to reach the AA width and then goes out to the stride measure.
Waist band/Top section: (waist msrmnt + seam allowance) x (waist band/top length + seam allowance).
In my example: 17.5 x 12

- yer pieces. except those rectangles will be much taller this go round.
Onto cutting!!!
Okay, don’t cut yet. The next three steps are meant to avoid cutting at all on a diagonal, which can make the skirt wonky.

- that dotted line is parallel to the selvages. length and width lines of the fabric should be guides for the length and width lines of your garment.

3. Fold fabric in half, lining up the selvages. Press to give yourself the middle fold as a guide. Leaving fabric folded, draw two rectangle pieces. Cut out. Unfold. Cut at the fold line. Now you have four!
4. Unfold fabric and lay flat. Fold end-on-end with the right sides of the fabric facing itself. This prevents you from having to measure out two skirt pieces, and if you leave right sides together and cut daintily you will not have to spend forever lining up your skirt pieces.
5. Measure out and mark your skirt trapezoid. Cut!
6. Pin skirt pieces right sides together. This will be very easy if you followed the light-face directions in step four.
8. Using a straight stitch and half-inch seam allowance, sew up the sides. Turn outside-out, and try on to make sure you don’t need to adjust anything.
9. Put two rectangles together, front sides facing and pin. With a straight stitch, sew up the sides. Put two other rectangles together. Sew up the sides.
10. Turn one rectangle band outside out. Insert into other band. Pin together along one of the raw edges.
11. Using the elastic thread in the bobbin, a zig zag stitch and a half-inch seam allowance, sew together the two bands. Press seams open. Turn outside out.
12. Insert the top of your skirt into the band so that the raw edges of the band face the raw edges of the waist. Line up the side seams and pin in place. (That underline is the big difference.)
13. Using the elastic thread in the bobbin, a zig zag stitch and a half-inch seam allowance, sew together the two sections. Press seams open. Turn outside out.
14. Flip waist band up. Put skirt on. Play with how many times over you fold the upper band for it to look right as a skirt.
15. Take skirt off. Using your double needle, hem raw edge of the skirt.
16. Go on holiday.
