


This Papercut Patterns dress has been in my brain for the better part of a year. When I really gave up hope on my wedding dress project, I briefly considered making one in white (my mother talked me out of it, I think based on the model’s grump-face).
So I made one for other people’s weddings. It was a somewhat intimidating process: I’d never used bias binding and never done a rolled hem. If you’re skilled at these things, Papercut is probably right about it being ‘rookie’ level. If not, it might take you longer than you want.
A couple of other details: the fabric is silk charmeuse, the lining is china silk (Fabric Mart had both in the exact same color for cheap about nine months ago so I bought them together), and I frenched all the seams.
1. Silk charmeuse binding is not for pansies. I was pretty terrified of making double fold bias tape, and the process was about as miserable as I’d expected. I used the store bought thingamajig, for 1/2 inch binding, and it worked fine. Easier than that silly pin method (I tried for a second, gave up), but not easier than, say, not making bias binding. I didn’t enjoy it, and the need to use bias binding that shows on a finished garment will continue to be a deterrent for me to trying new patterns.
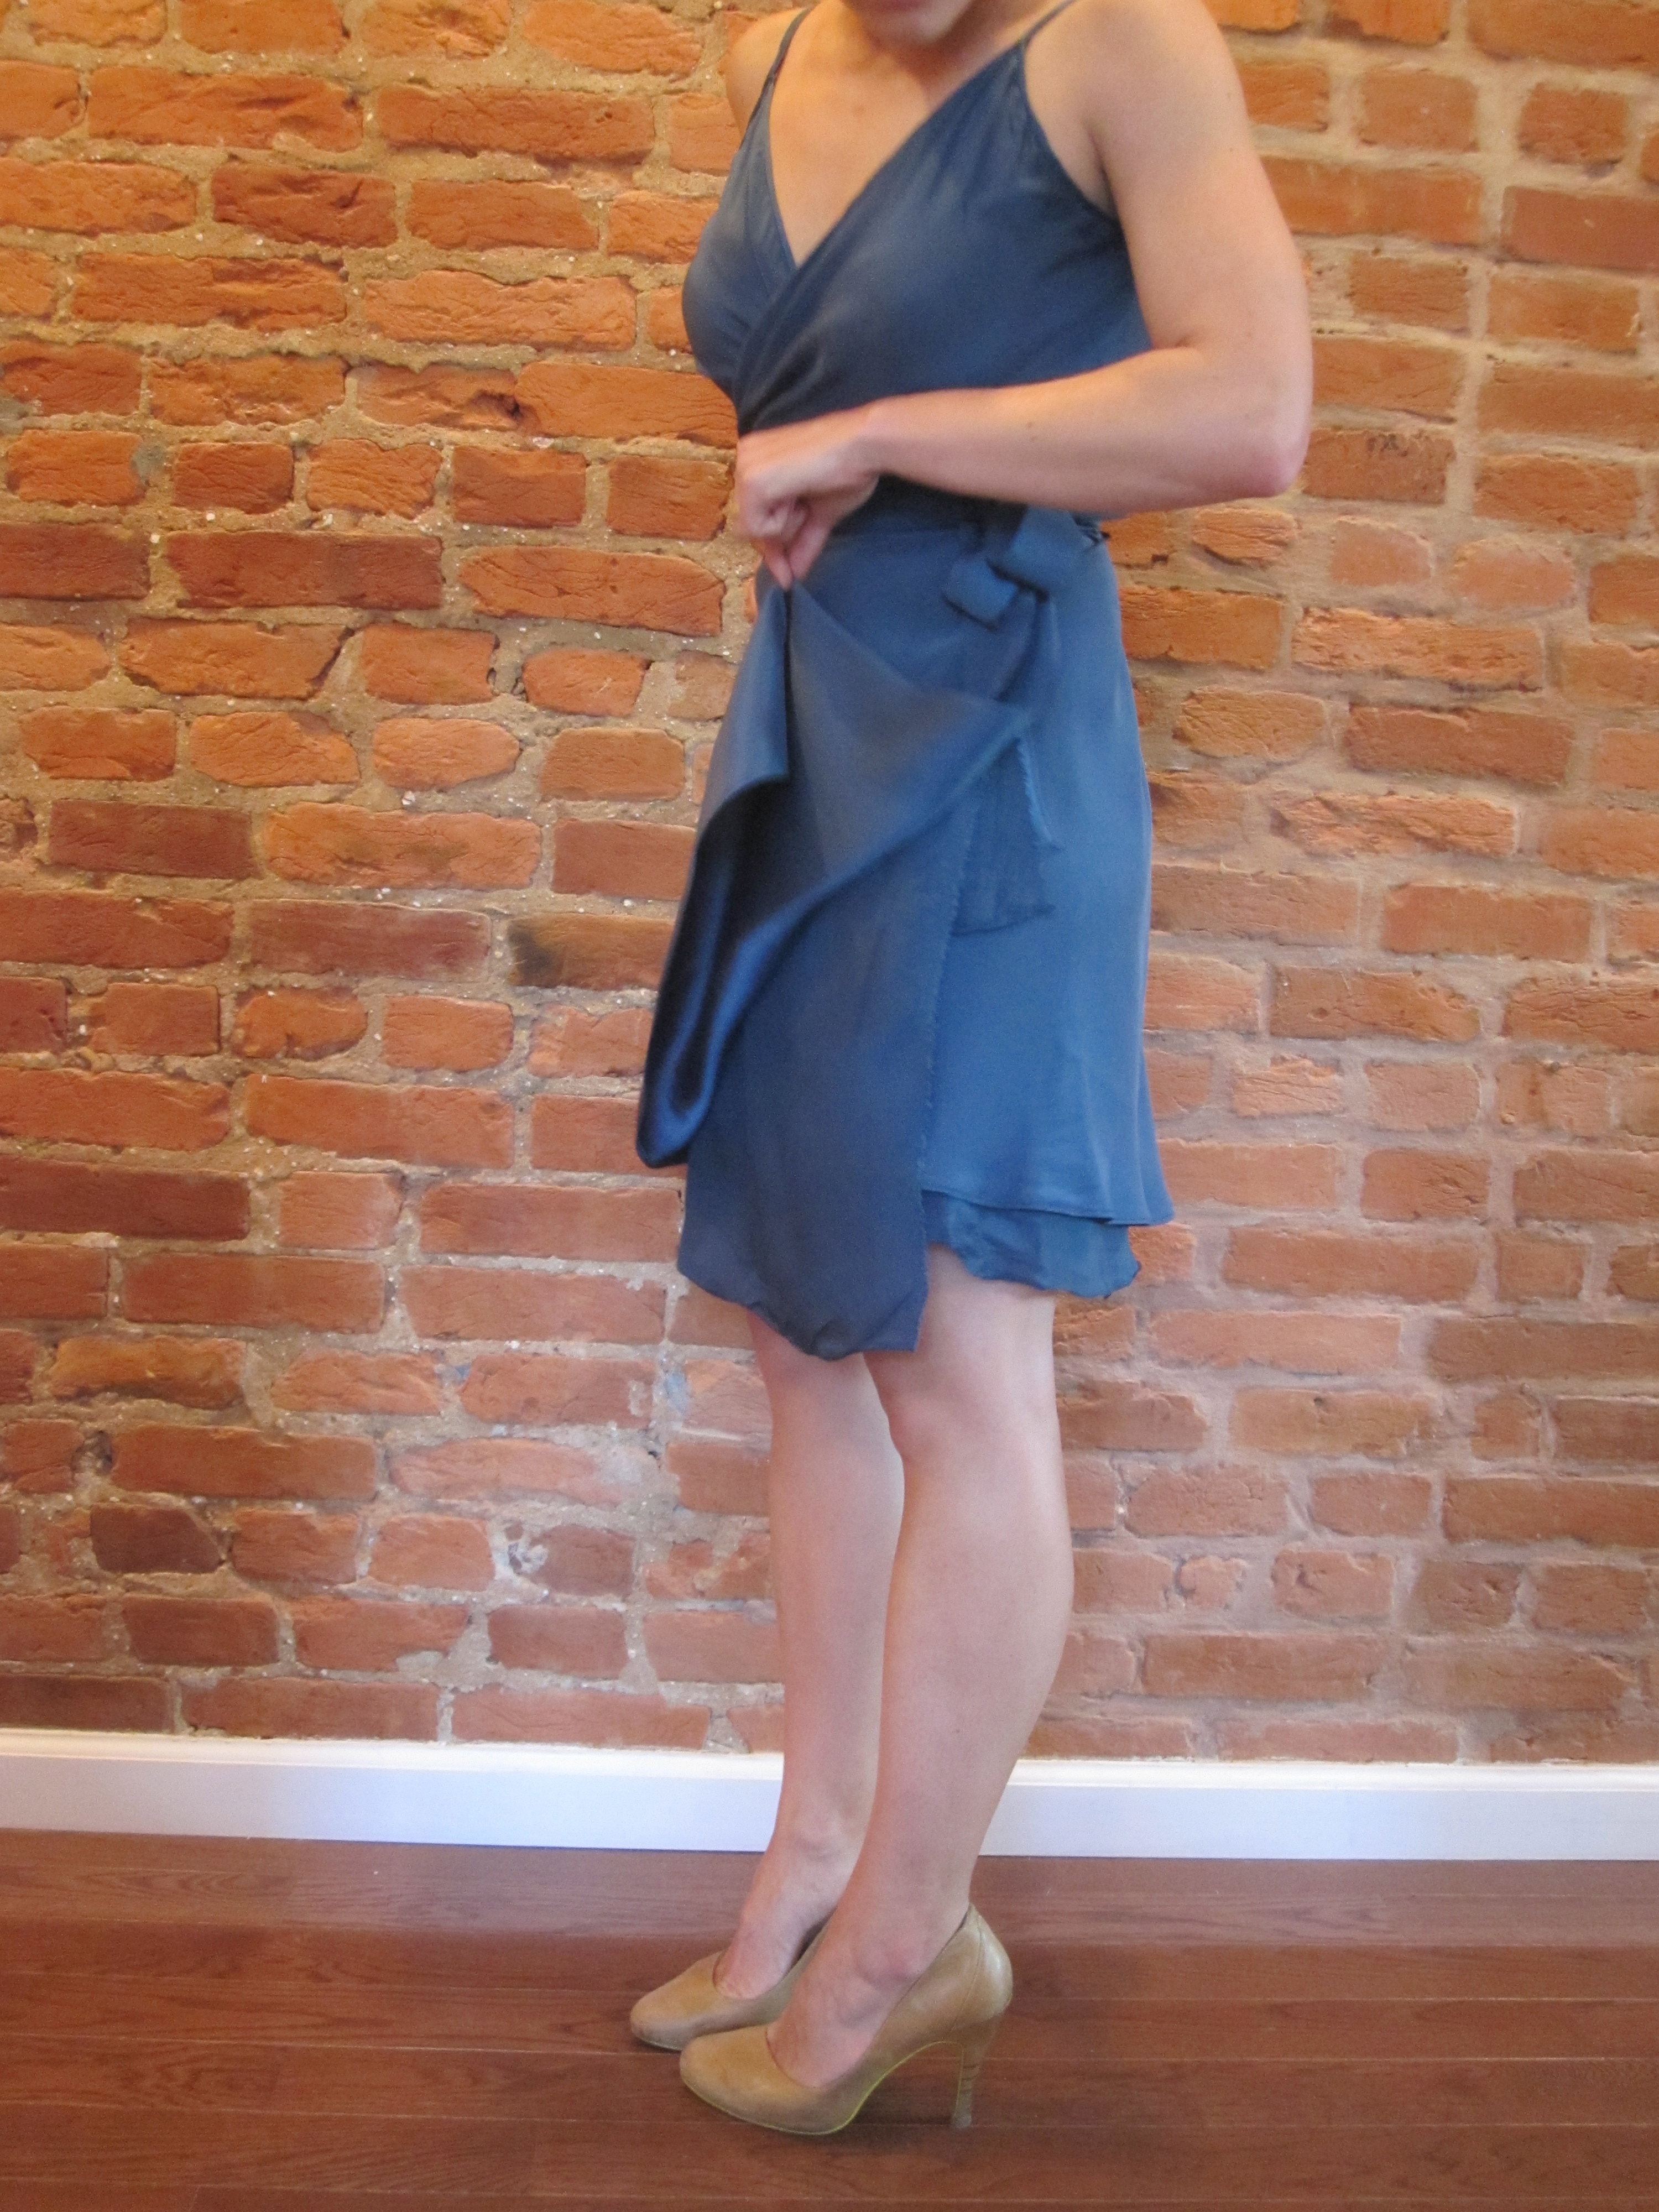
2. Something’s up with the bodice. Even in the very nice versions on the interwebs, the bodice seems a little less DVF and a little more nursing mother — almost too much coverage is going on? Several people complained of gaping at the side boob. The top corners of the wrap looked so high on bloggers who I know are tall, that I dropped them an inch in the front and the back. And I think the peaks of the wrap still look a little high on me. In terms of pattern alterations, I:
:: lowered the back neck a full inch.
:: lowered the front peaks a full inch.
:: reduced the bodice length by half an inch (in hindsight, a bad idea given the inches I’d already taken off its length).
:: increased the armhole height half an inch on side front and back bodices, and smoothed the armhole curves to account for all the changes.
:: straight up copied A Handmade Wardrobe and tacked down the strap on each end to create a double strap rather than that silly looking bow. Multiple bows look ridiculous on grown-ass women, especially short ones.
:: measured the excess of material/gaping at the side boob. Again, from AHW: sewed basting stitches and then gathered the material to reduce the length by the 2 inches of gaping I had. This is better executed on my right side (left in photos) than on my left.
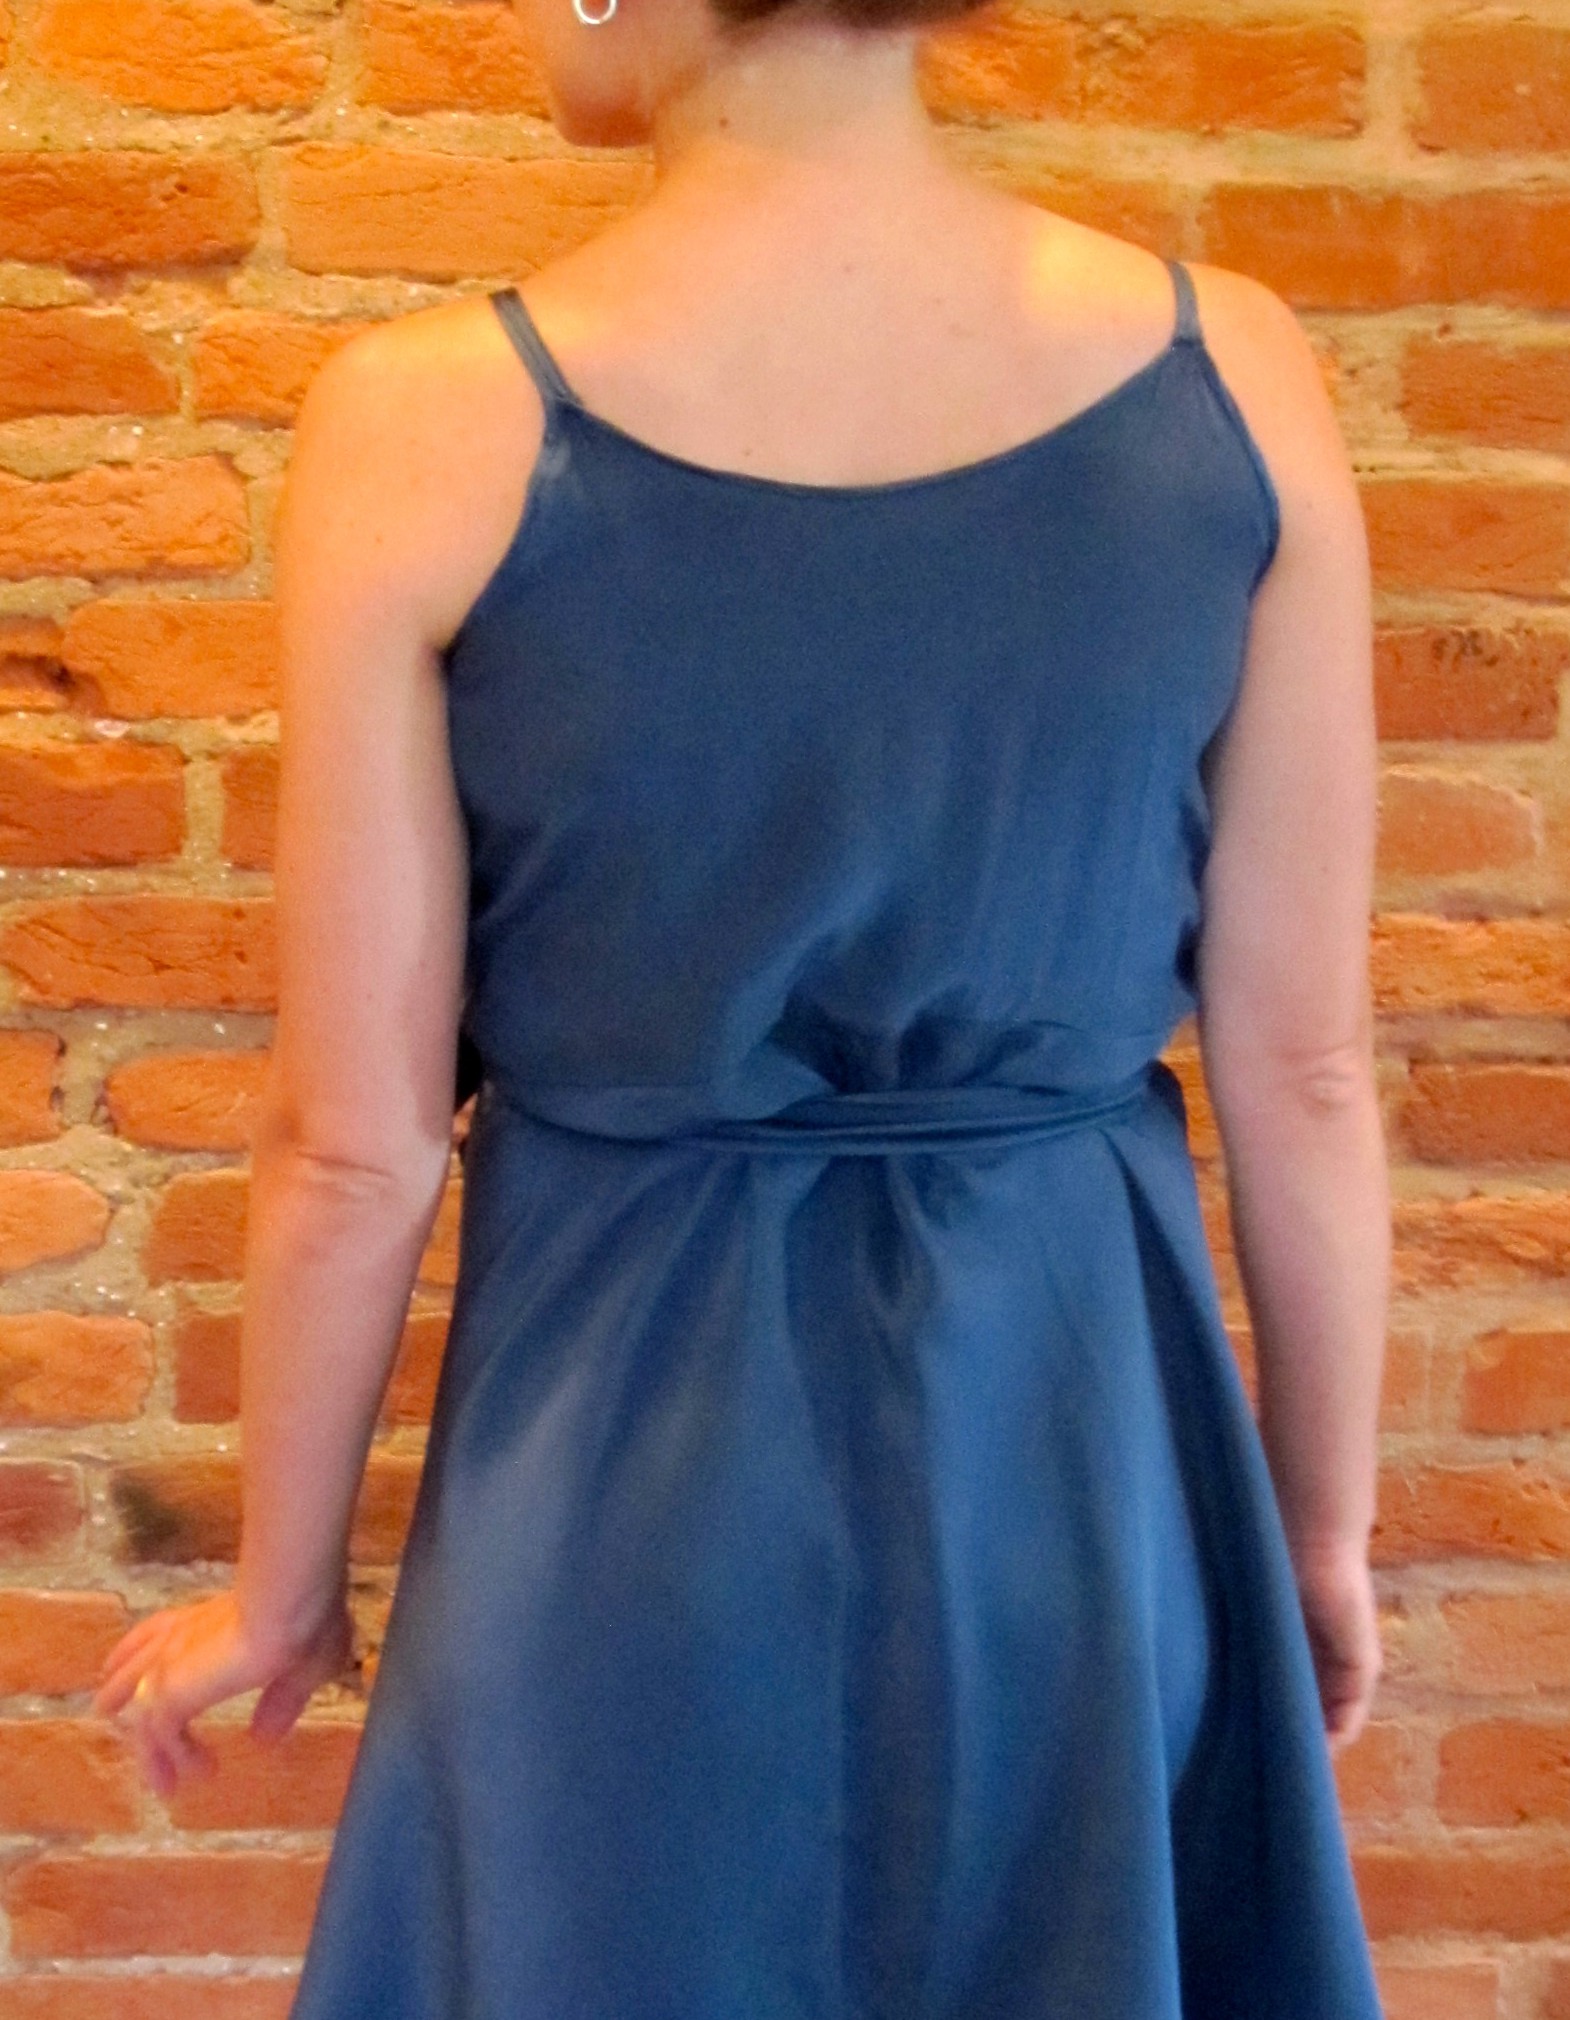
There’s still something a bit weird with the back bodice — the seam with the skirt is definitely higher than waist level and seems higher than it should be. See it above the tie?
3. There’s no hole to slip the tie through on the side bodice of this wrap dress. I’ve got just one true wrap dress in my closet (which I bought at Ross just in case a funeral that ended up happening happened). It has a tiny slit in the side seam through which you slip the opposite side tie, so that both sides of the bodice lie flat. This dress does not have any instructions for making a slit. A better seamstress could have fashioned one, but I am not (yet) that seamstress.Well that’s embarrassing! As pointed out by Chantal in the comments, step 5 does, in fact, tell you to stop sewing 3cm before the end of the bodice pieces on one side. I regret the error, both the initial one related to my evidently poor reading comprehension, and for the subsequent dissemination of incorrect information.
This means you I have to cross the two ties and two bodice pieces over one another. The front piece close to your my body ends up weirdly folded over itself, which creates some bunching.
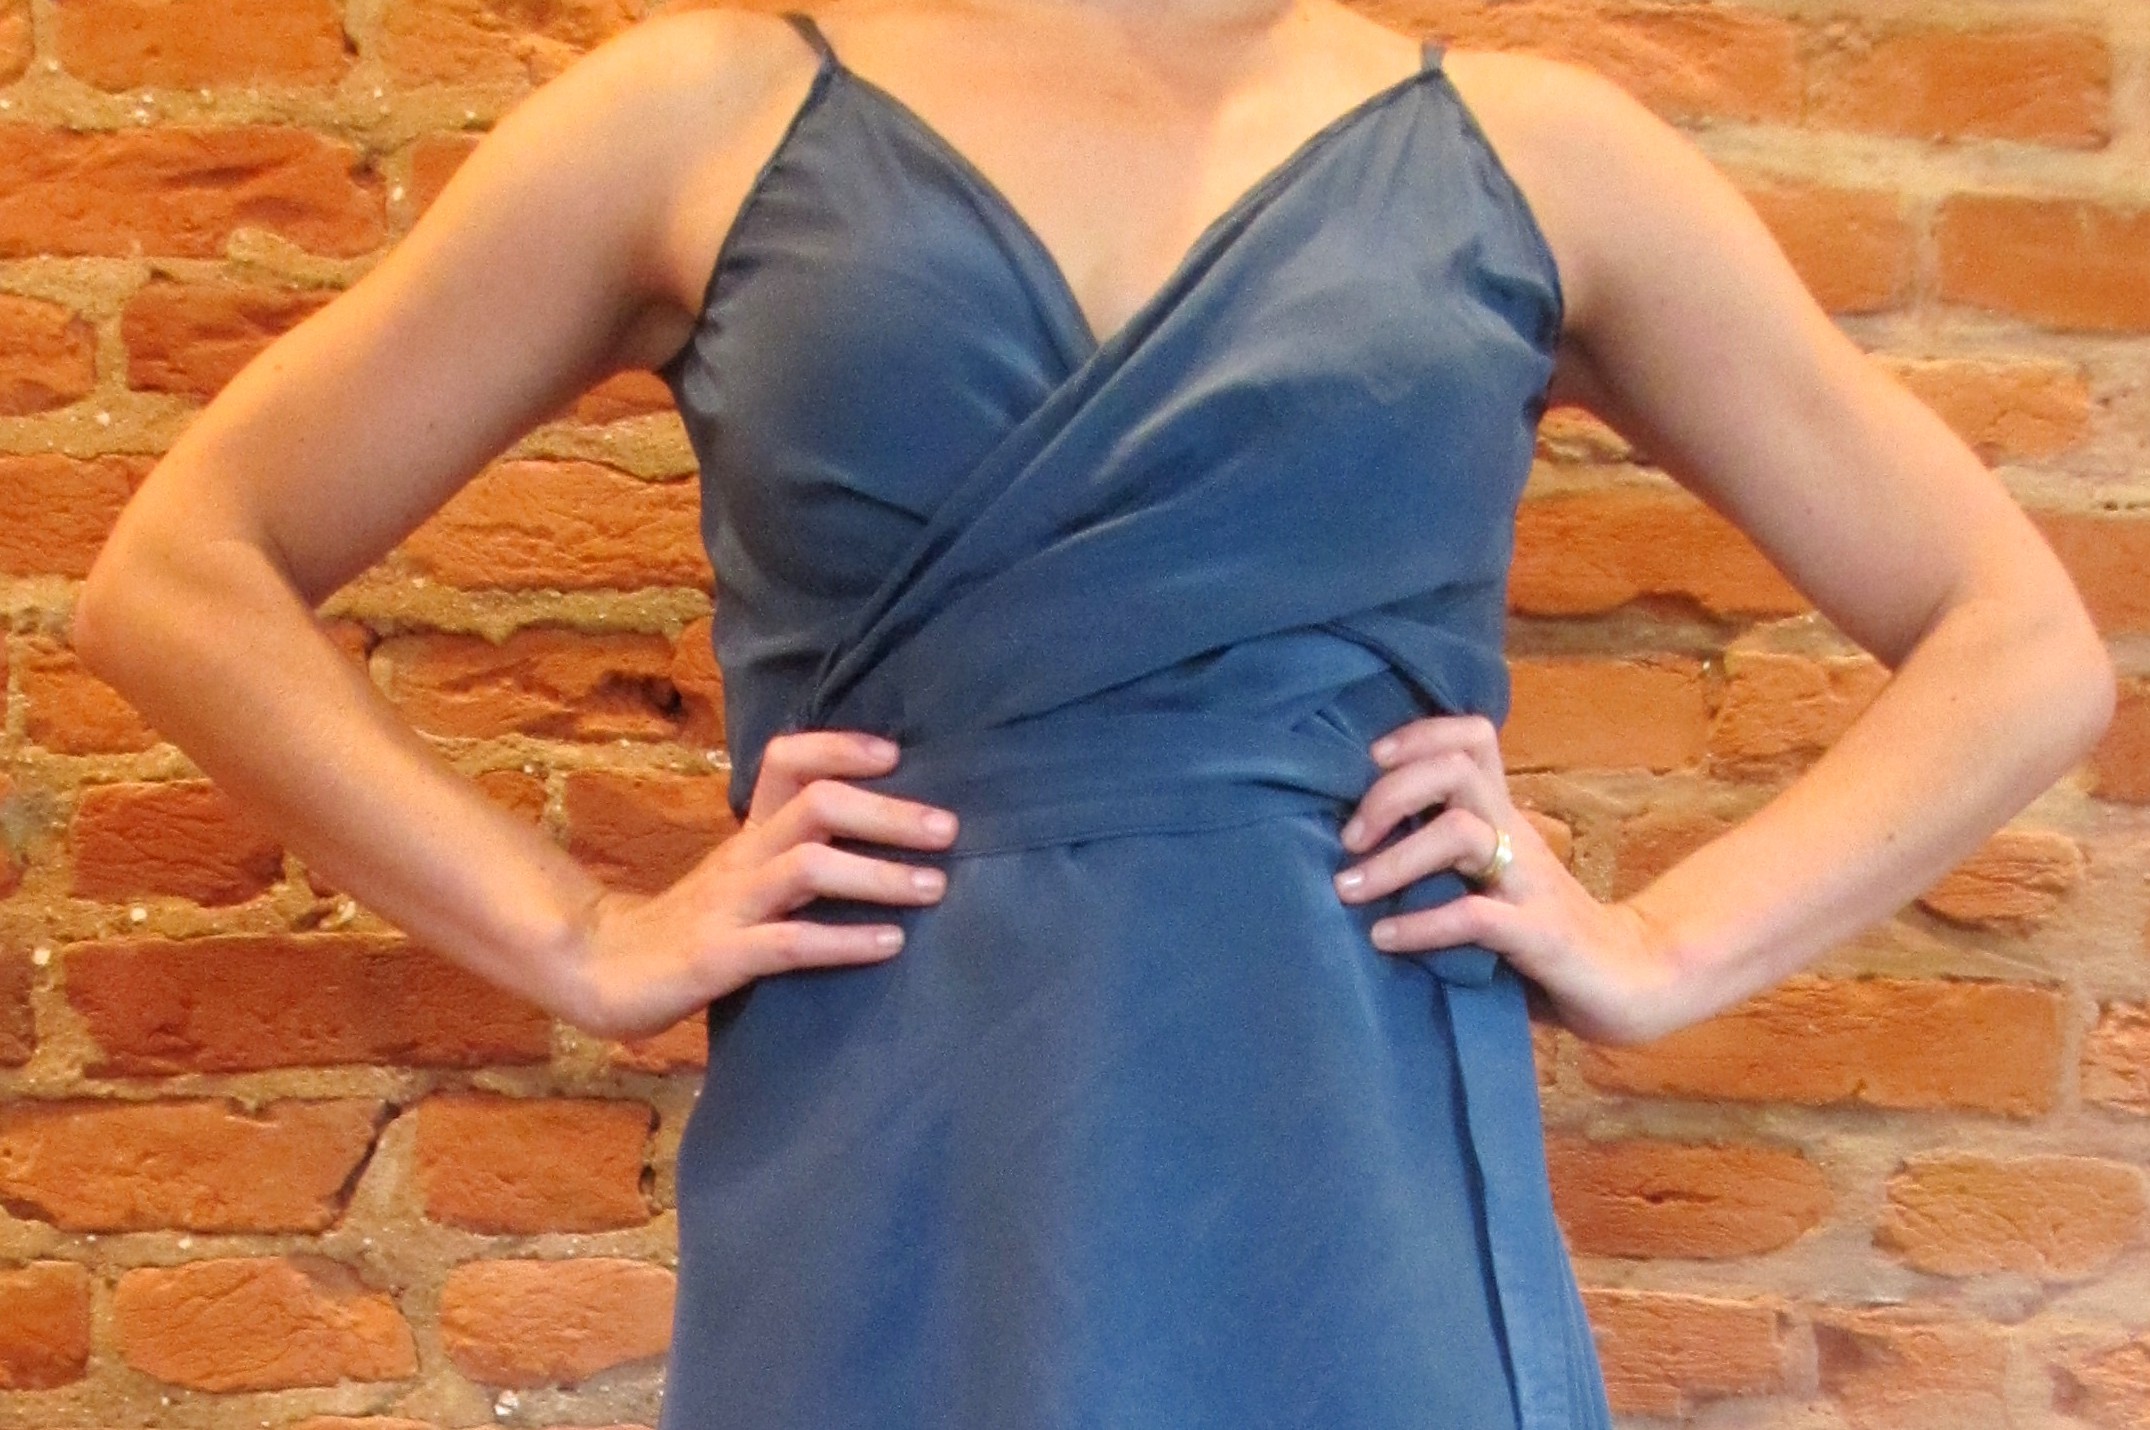
If it’s me doing something wrong here, let me know. I did ask google ‘how do i tie a wrap dress’, but don’t see anything really obvious here that I’ve missed. It was me.
4. I should have lined the bodice as well as the skirt. The charmeuse is delicate, and it would have helped to just have the additional backing of some of that china silk to take some of the strain of normal wear.
5. This was ALSO the first time I used my rolled hem foot, acquired in this singer multi-pack. I had excellent results in some places, not so excellent in others. Overall medium, but good to start picking up the skill I think.
6. Life Lesson: be a little more patient. I wanted to finish hemming the dress like four days before I did, knew it was too long and just lopped off two inches from the skirt. Stupid. It was too short. In the end, it was lucky I’d already decided on the lined skirt. I don’t mind having the lining peak out from underneath the skirt, but I wish I hadn’t been so heavy handed in the first place.
But whatever: A dress! I made it!

Would never have known someone made this! It came out great! 🙂 http://trend-mixblog.com/
Your dress looks awesome! I can’t believe you used silk for your first go at bias binding and a rolled hem – so brave! My rolled hems look awful even on cotton, and I’m still afraid of sewing with silk. I’m glad my dress modifications were helpful 🙂
About the side slit, I vaguely remember the instructions saying where not to sew to leave a slit on one side for the tie, but I had a tricky time finishing the edges since I did french seams (more rolled hems, ack!).
Thanks for the complements, and for your very helpful tips in the posts.
And also, many thanks for pointing out my error. You are right, it’s in step 5. I’ve revised the post.
On that, I also did French seams: how did you finish the slit, then? Did you actually do rolled hem for the first 3cm to basically roll the edge under where the tie passes?
I did a rolled hem all the way up each of the bodice pieces and then sewed them together leaving a gap for the tie. It was incredibly tricky with the narrow seam allowance, though!