
A few years ago, when I was a little baby sewist, I set about making a winter coat. I loved its simple lines and the fact that I made it, but the thing was showing my inexperience. It never properly fit across the chest, or closed quite right below the waist. It frequently came unsnapped.
I’ve also been drooling over this Burberry coat for the last year. (They don’t carry it anymore.)

Enter Style Arc’s Stella coat.

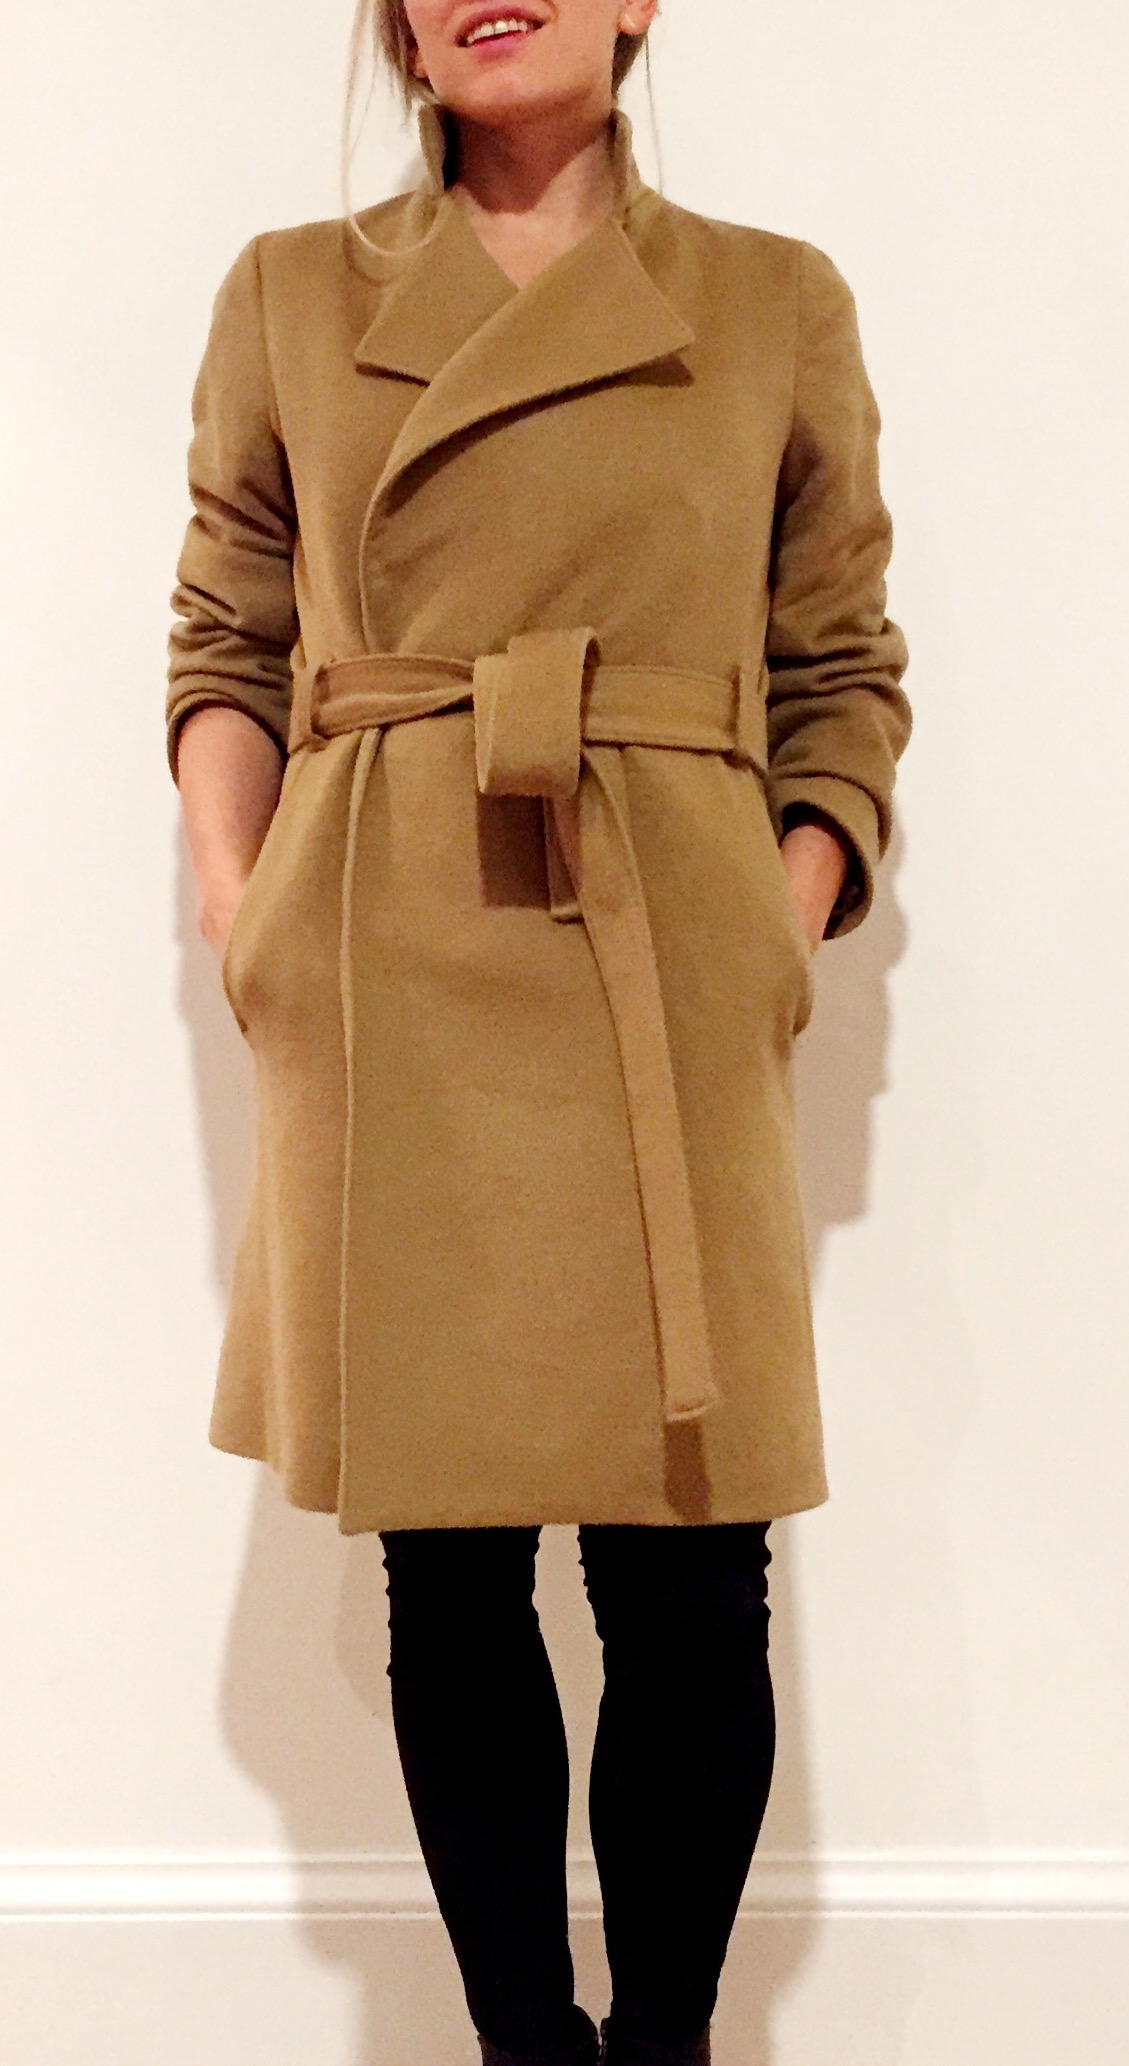
It’s not exact, but we’ve got clean lines, a stand collar and a self-belt. Here is my best attempt at imitation. I tried…

It’s been reviewed comprehensively elsewhere, but here are a few fitting and construction notes.
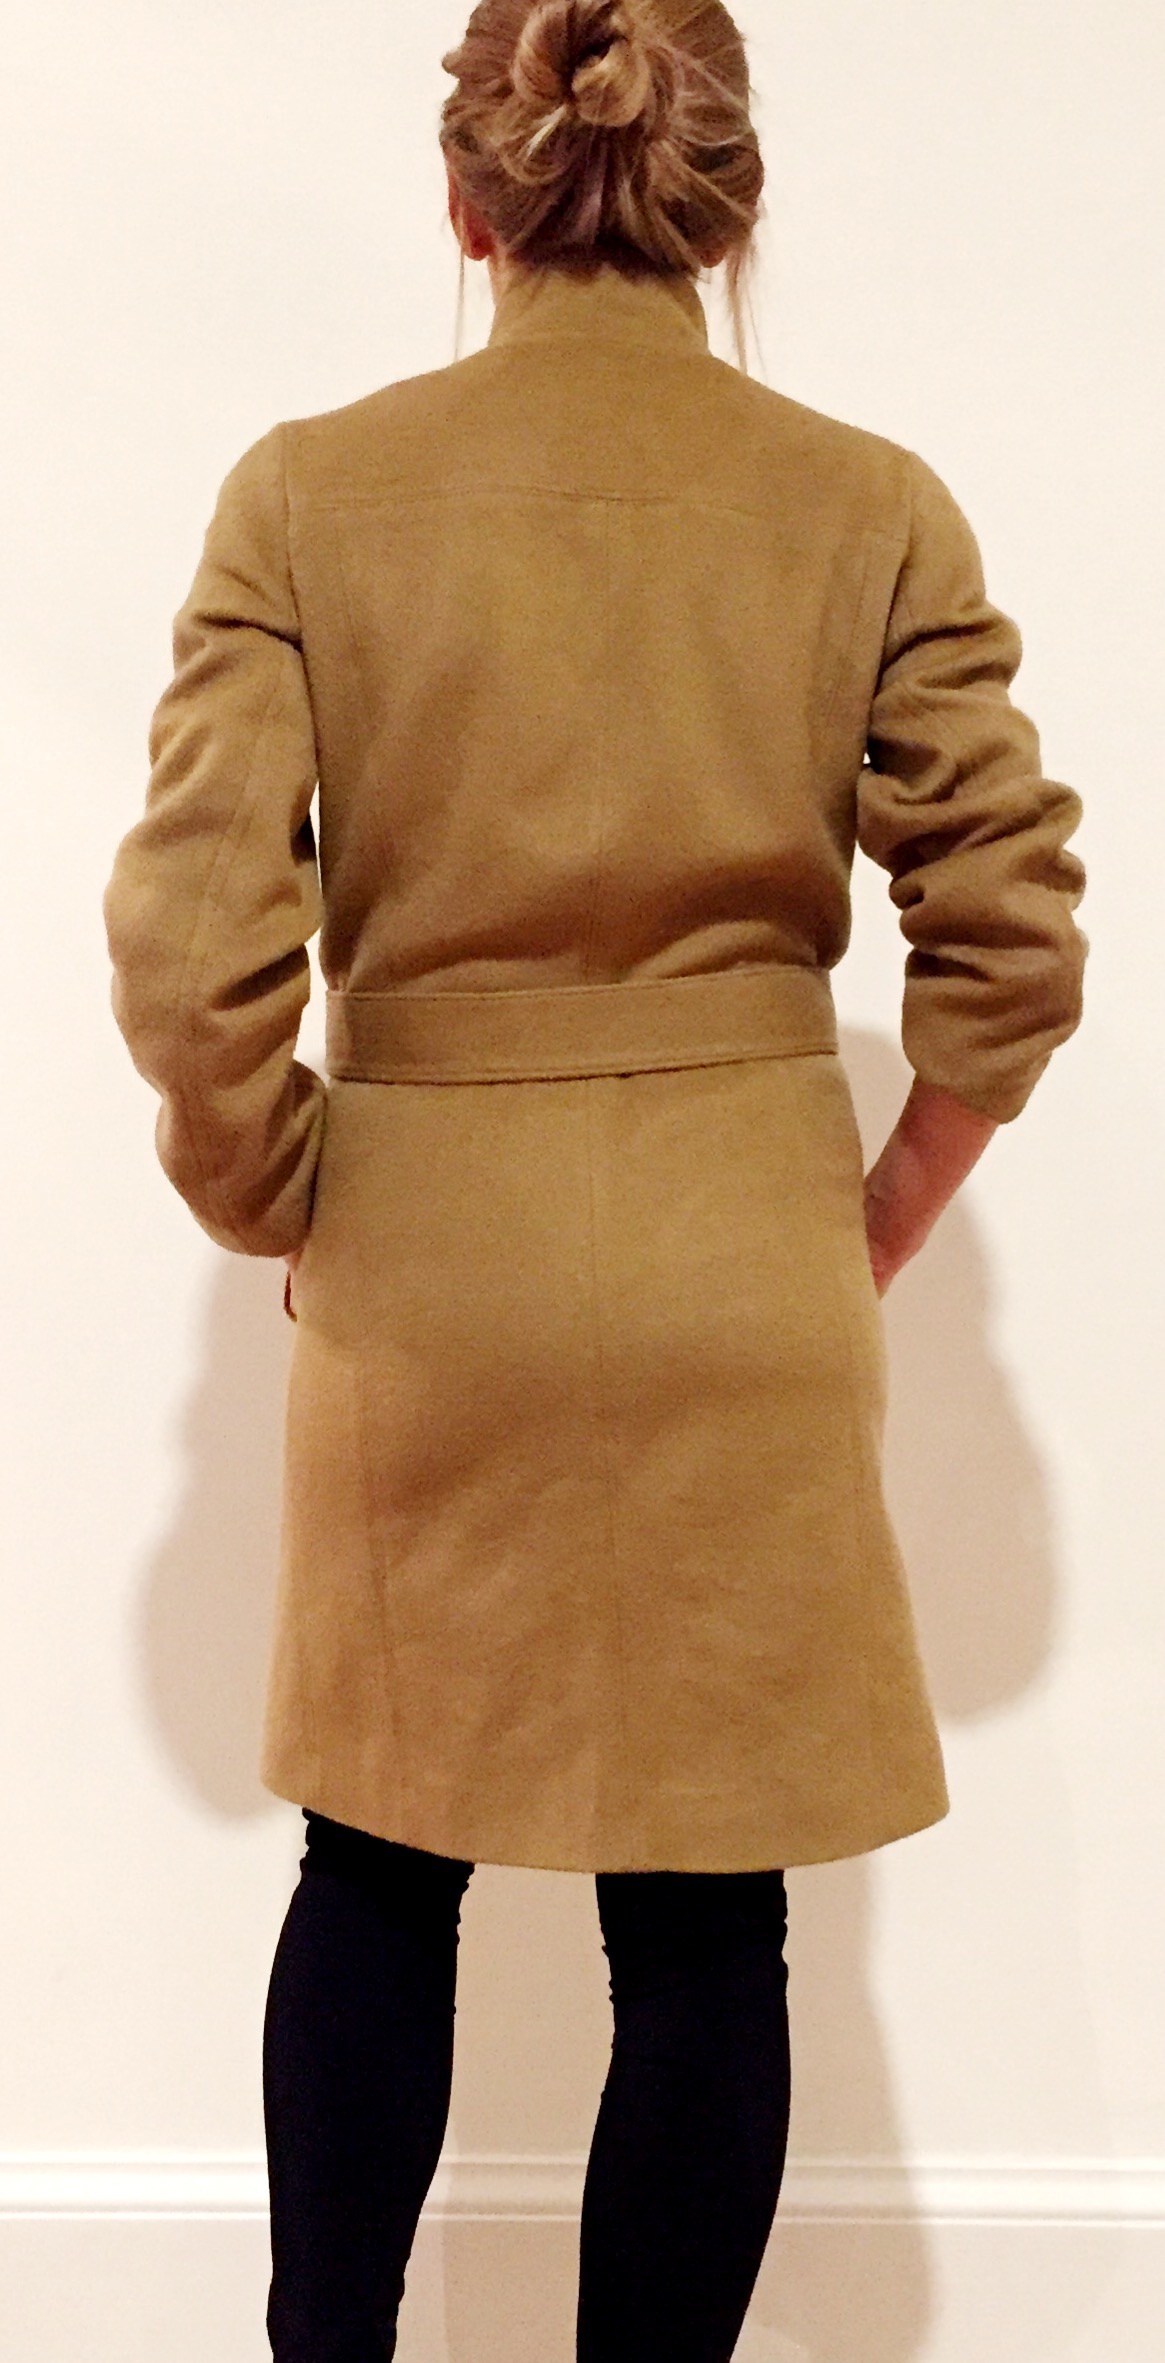
A few more shots for posterity and lining flashing.


On fitting, I wanted to do a full bust adjustment, but gosh am I lazy. While there IS a bodice dart (leading into the neck line), I just wasn’t feeling a proper adjustment, and also I was very very short on tracing paper. So….I took the lazy way out and used this Maria Denmark no-dart FBA again. It looked like this (pink line is drawn on the tracing paper taped to the back of the front piece).

I’m not sure if that shortcut is legal — I can see substituting it for a real FBA not working well at all with a fitted bodice — but it seemed to do the job on this overcoat, so whatever.
The lazy FBA also made adjusting the included lining pattern much easier – all I had to do was tape the same adjusted shoulder and side seam line onto the lining piece for cutting out, rather than dealing with the intersection of the coat facing and front lining. Saved a massive headache even if it wasn’t proper.
The other adjustments I made (all by folding out, rather than slicing and retracing):
- I reduced the lapel by 3/4″ at the top corner, reducing to nothing at the roll line. This was basically because the lapel looked a bit wider than I wanted it on previous makers, and I’m a bit shorter than they are, so I thought it might overwhelm me.
- Removed 3/4” from above the waist to shorten the bodice on all fabric and lining pieces (Note: There is no waist line drawn on the pattern pieces, which means this takes a little fussing to get things right without jacking up the alignment of the notches. Basically, each pattern piece needs to be lined up with its neighbor in order to draw a waist line that’s in the same spot across all pieces and doesn’t interfere with the marked notches).
- Removed 2” in length from the bottom of the bodice on all fabric and lining pieces.
- Removed 3/4” in length from the sleeves and sleeve linings at the elbow.
- Removed 3/4” in length from the sleeves and sleeve linings at the cuff.
- Removed 1/2” at center back from the back yokes and back collar, and 1/4” each from the upper back pieces, grading to nothing at the waist. In hindsight, I could’ve just removed 1/2” all the way down but whatever.
- In terms of construction, interfacing is a big deal here. The wool nylon blend I used for the body of my coat wasn’t terribly thick, so it needed a bit more structure. Here’s what I did:
- Fused ProWeft Medium from Fashion Sewing Supply to the collar, front pieces, front facing.
- Fused ProWeft Light: all other body pieces, and the sash piece.
- I also underlined all lining pieces in the body of the coat with yellow cotton flannel. It adds an extra layer of warmth that many ready-to-wear coats lack. Yes, I know it’s supposed to be wool flannel for winter, and that cotton doesn’t let the same air/moisture flow, buttttt. I had cotton in my stash in a horrible yellow color that needs to go, so that’s what I used.
- I left the sleeve pieces unfused (except for the sleeve hem facings) and unlined.
Couple extra notes:
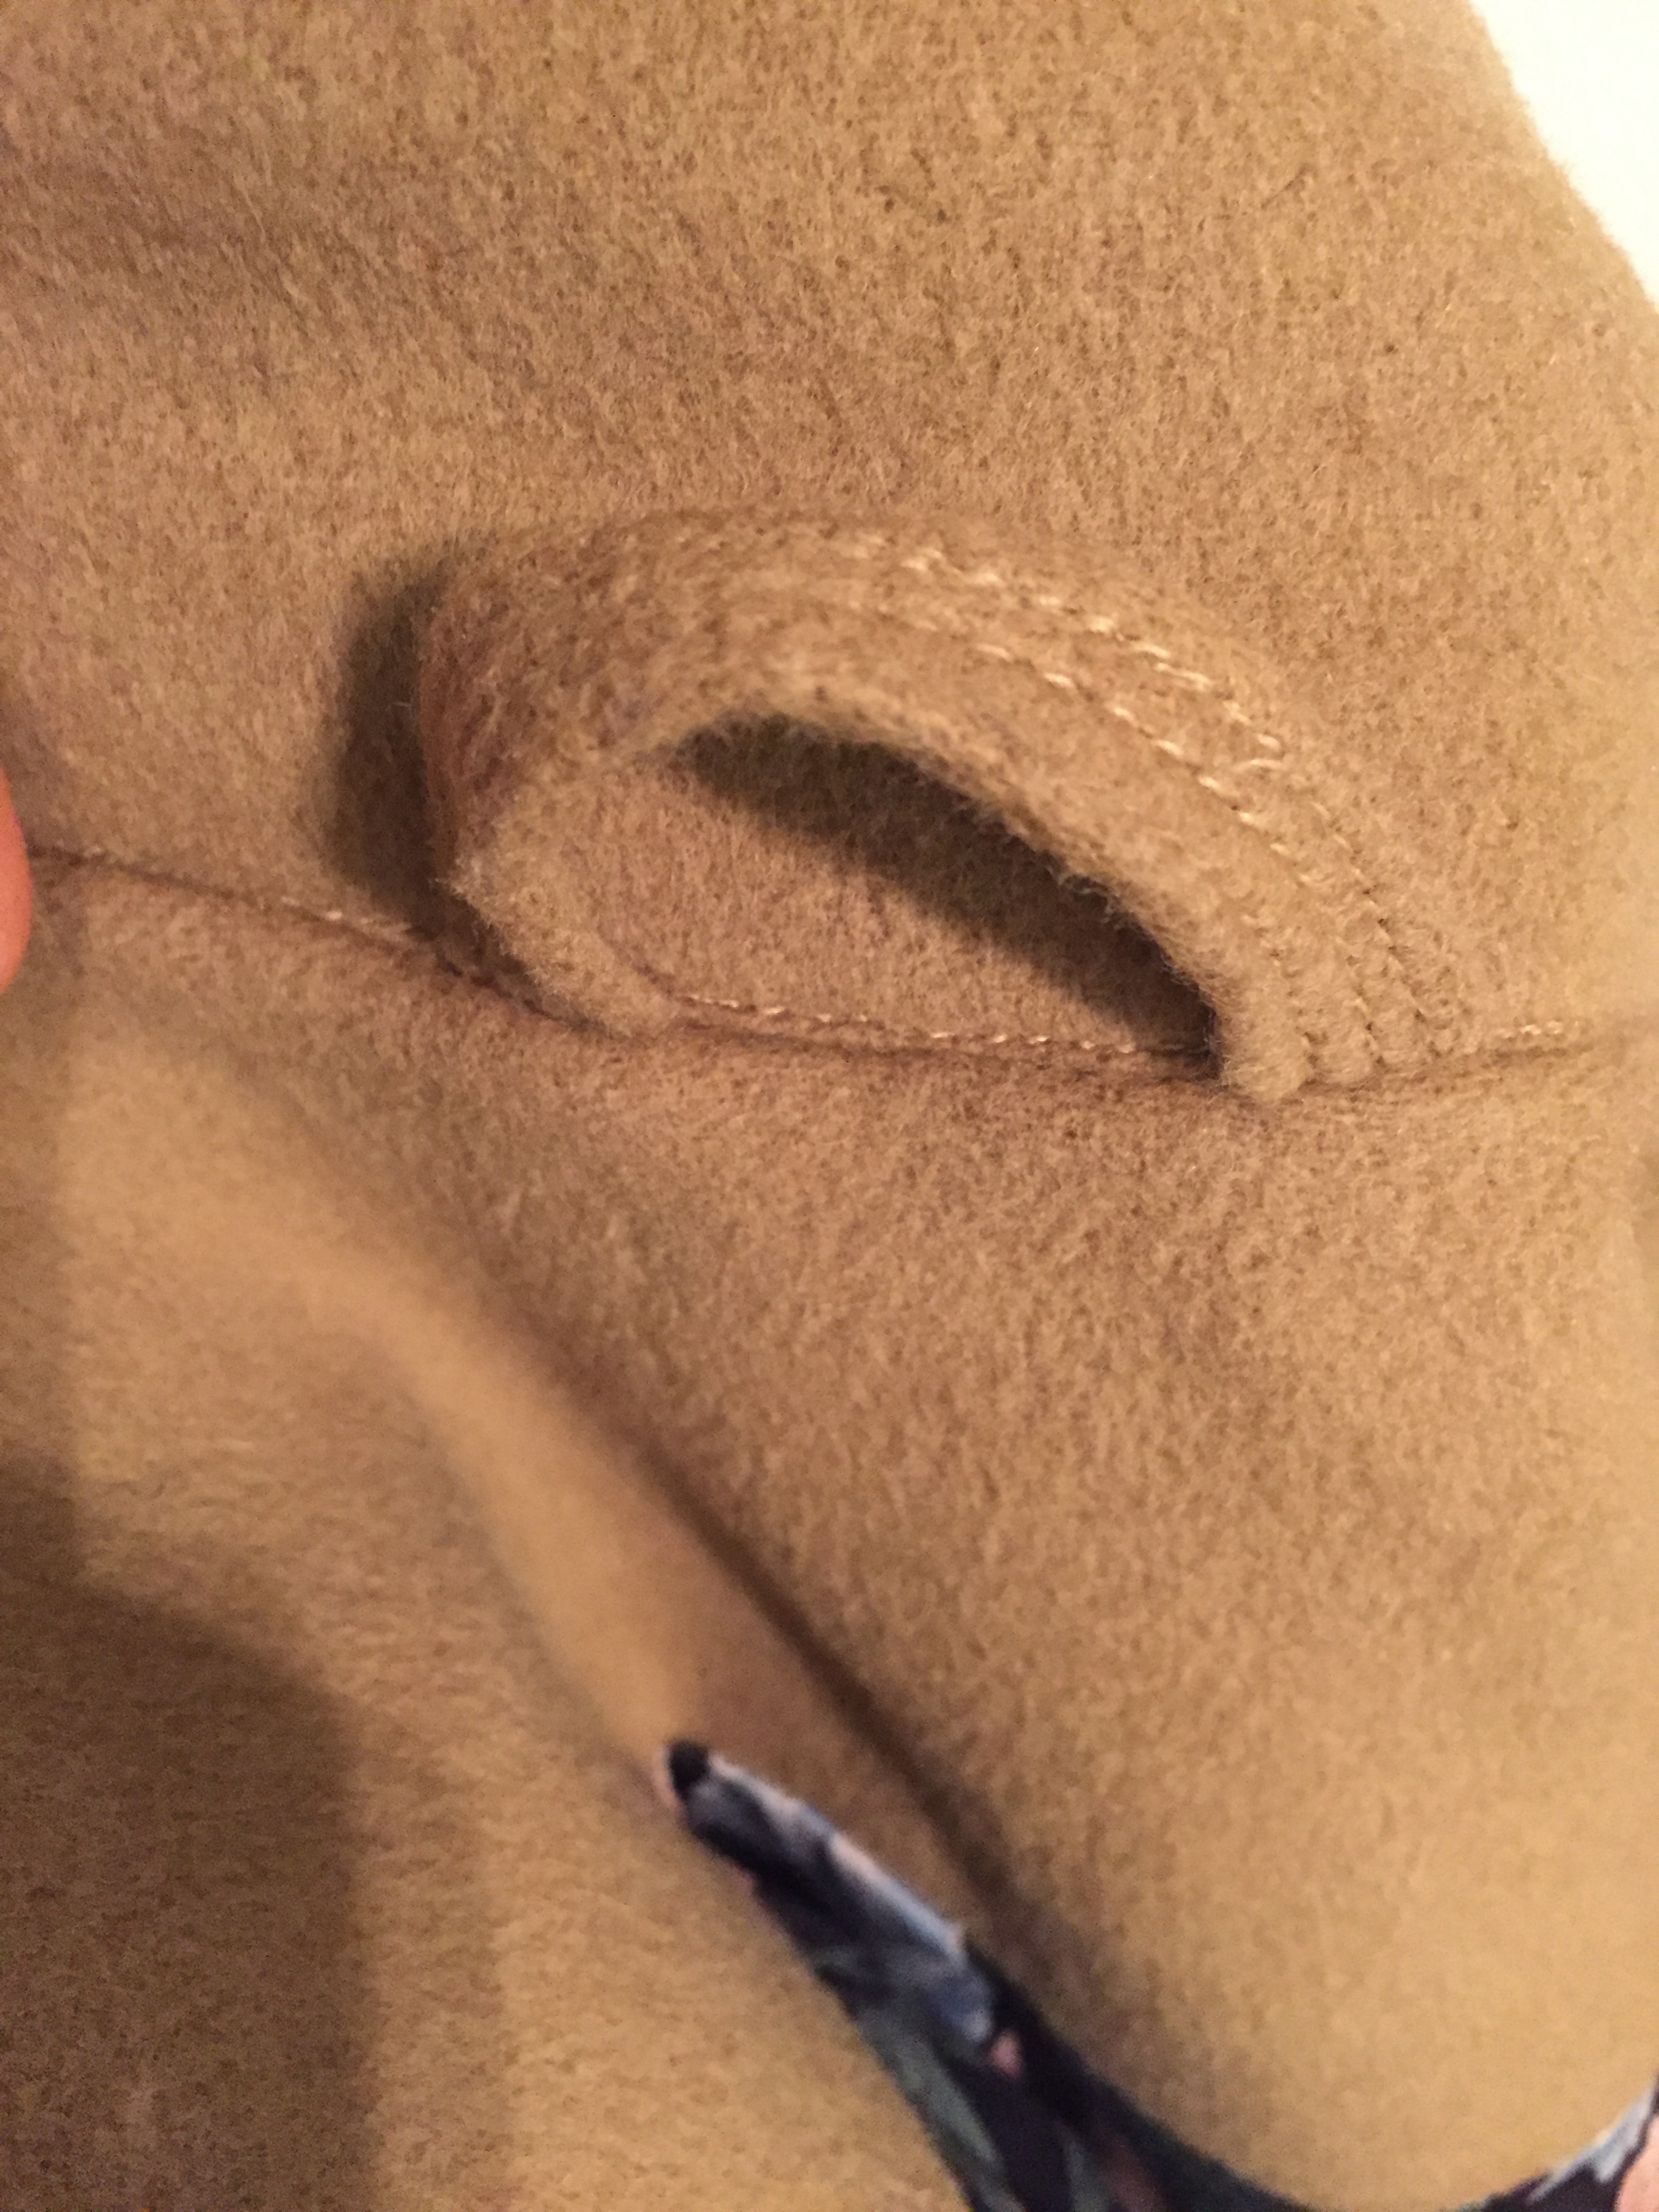
- There are only two belt loops, which I thought wouldn’t be enough at first has been totally fine.
- The belt loop piece was way longer than it needed to be for the two loops. I used the excess to make a hanging loop for the coat, which I sandwiched between the back yoke facing and the collar.

- I loved this pattern, normal Style Arc gripes aside (several pattern notches are missing, instructions a little shakey, etc), but I’ve made enough lined jackets/coats at this point that it wasn’t too much trouble. This pattern would be a pretty good one for a beginner coat maker, so long as said maker keeps a jacket construction book close at hand (I mostly use this one).
- I did bag the coat lining. But instead of leaving a small hole in the sleeve, I left it in the bottom of the hem. This has the added advantage of being large enough to shove your tailor’s board up in between the layers in order to get a nice crisp press between the front of the coat and facing. I then catch-stitched the open part of the hem in place, and slip stitched the lining to the hem. It worked out well, and I actually found it less worrisome. The turning stress wasn’t as big of a deal on underlined fabric rather than the thin silk charmeuse lining of the sleeve. (That’s the same method outlined for the Clare coat here, though I didn’t see that until just now!).
- The front pockets are pretty far forward, which makes the stuff in your pockets easily accessible. But. If you are like me and use your pockets mainly to keep your hands warm, know this: the pockets are between the front piece and the side front piece, not at the side seams. To me, they’re so far forward that I always feel like I’m trying to execute the Kate Middleton modesty crotch clutch. If I were to make this again, I’d set them in at the side seam. I would also add heftier fusing to the side seam at the pockets so they could take a bit more stress.
- The included fusing pattern pieces for sleeve hems are really helpful, as are the included lining pattern pieces – which are actually well-drafted lining pieces, NOT just instructions to cut duplicates and hack an inch off the bottom as I’ve encountered on two other jacket/coat patterns from Vogue. That can lead to kind of crappy results, especially for beginners who don’t know better and then wrestle with linings peeking out of their hems forever.
- I accidentally used ProWeft Light to make the ‘sleeve head’ – a piece of fusing that is meant to keep the shape of the shoulder in much the same way a normal sleeve head does. Mine ended up being pretty limp because my fusing was too light for the fabric, so I installed a proper sleeve head. I was in a rush, but a more considered maker might have also added a thin shoulder pad. The coat doesn’t need it, but it could probably benefit from a shoulder pad.
Side note: are you people serious about block fusing??? How do you even do that without getting fusing glue all over your iron and/or ironing board? I tried. I failed. I stopped.

super chic, love it and the fit/length is spot on.
Thanks.
Your teal coat is great, by the way. And you couldn’t be more right about the interfacing. My whole coat is interfaced, but I feel like I could have used an even stiffer grade and used horsehair in the collar. It’s hard to know how far to go with those things.
There is something really satisfying about coat making and also in a project which makes you realise how far you have come as a sewer/ist! I think you nailed it!
Louise
Agree on the satisfaction points entirely. Thank you
Congratulations! A coat is new easy project and you sewed this up like a pro. It’s much more special than the Burberry coat because you made it. I can tell that a lot of work and love went into this project.
Thanks! And yes, it’s not like that Burberry coat was ever on my shopping list, but I agree that it’s great to be able to customize looks you like to something that suits.
I love this coat! It is so chic in that camel color. I hear you on the block fusing! I’ve done it before and it is such a hassle. Now, I usually “rough cut” my pieces, fuse, then cut them more precisely. It does save you from random shrinkage that can happen otherwise.
Thank you. And good to hear it’s not just my problem. I really thought I’d missed something on the block fusing.
Does your fusing shrink enough when pressing that it shrinks inside the seam allowances? I’ve never had that happen, or maybe it’s not as big a deal with thicker fabrics than with thinner ones?
I laughed out loud at the Kate modesty clutch. I’m a hands in the pocket kind of girl and that makes me rethink this pattern.
Hah– good! I actually think it would be fine to just move the pickets. It’s hard to tell on the line drawing, but there is a narrow side front piece and a narrow side back piece. So you could shift the pocket to be between those two pieces, rather than between the front and side front, as indicated on the pattern.
Looks great inside and out! The lining is gorgeous
Thanks! I’m pretty unadventurous with my outer fabrics but I do love a crazy lining. (And also, it’s a good way to get silk linings on the cheap.)
Well this pattern just went right on my shopping list–your coat is beautiful!! I love the fabric you used, too (so much so that I now want a camel-colored coat!), and who doesn’t love a good statement lining?!? =)
I loooooove a good statement lining. But I think Beth (sunny gal, up there ^) said she doesn’t like them in a recent coat post. And recently I’ve thought that while I love nutso lining for the body, I should maybe do the sleeves in a matching color.
Anyway, I hope you make it so I get to see another version!
Lovely coat. Congratulations!
Thanks so much!
Gorgeous. One day I’ll make myself a camel coat…. next winter! Thanks for all the details on the interfacing you used. Hope you love this!
Great coat! A classic you’ll keep forever.
(You were probably typing too fast, you’ve written yolk, when you meant yoke.)
Thanks so much. Correction forthcoming…