A couple of years ago, I made my wedding dress. It was daunting, I was out of my depth, and I made some pretty big mistakes. But. I had a deadline and I had to finish or face wearing a $700-1500 pile of polyester in the middle of June in Virginia.
I’m in the midst of another project where I’m daunted, out of my depth, and several mistakes in. But we’re in the third fall/winter season of this being a work in progress, and I have really, really got to find some will to finish it. That will might end up coming in the form of several updated posts, so if men’s tailoring isn’t your thing, you might have to join up again in December. For those of you interested (and better yet, experienced!), please know that any and all advice is most, most welcome.
Here we have a black coat I’m making my husband. Still.
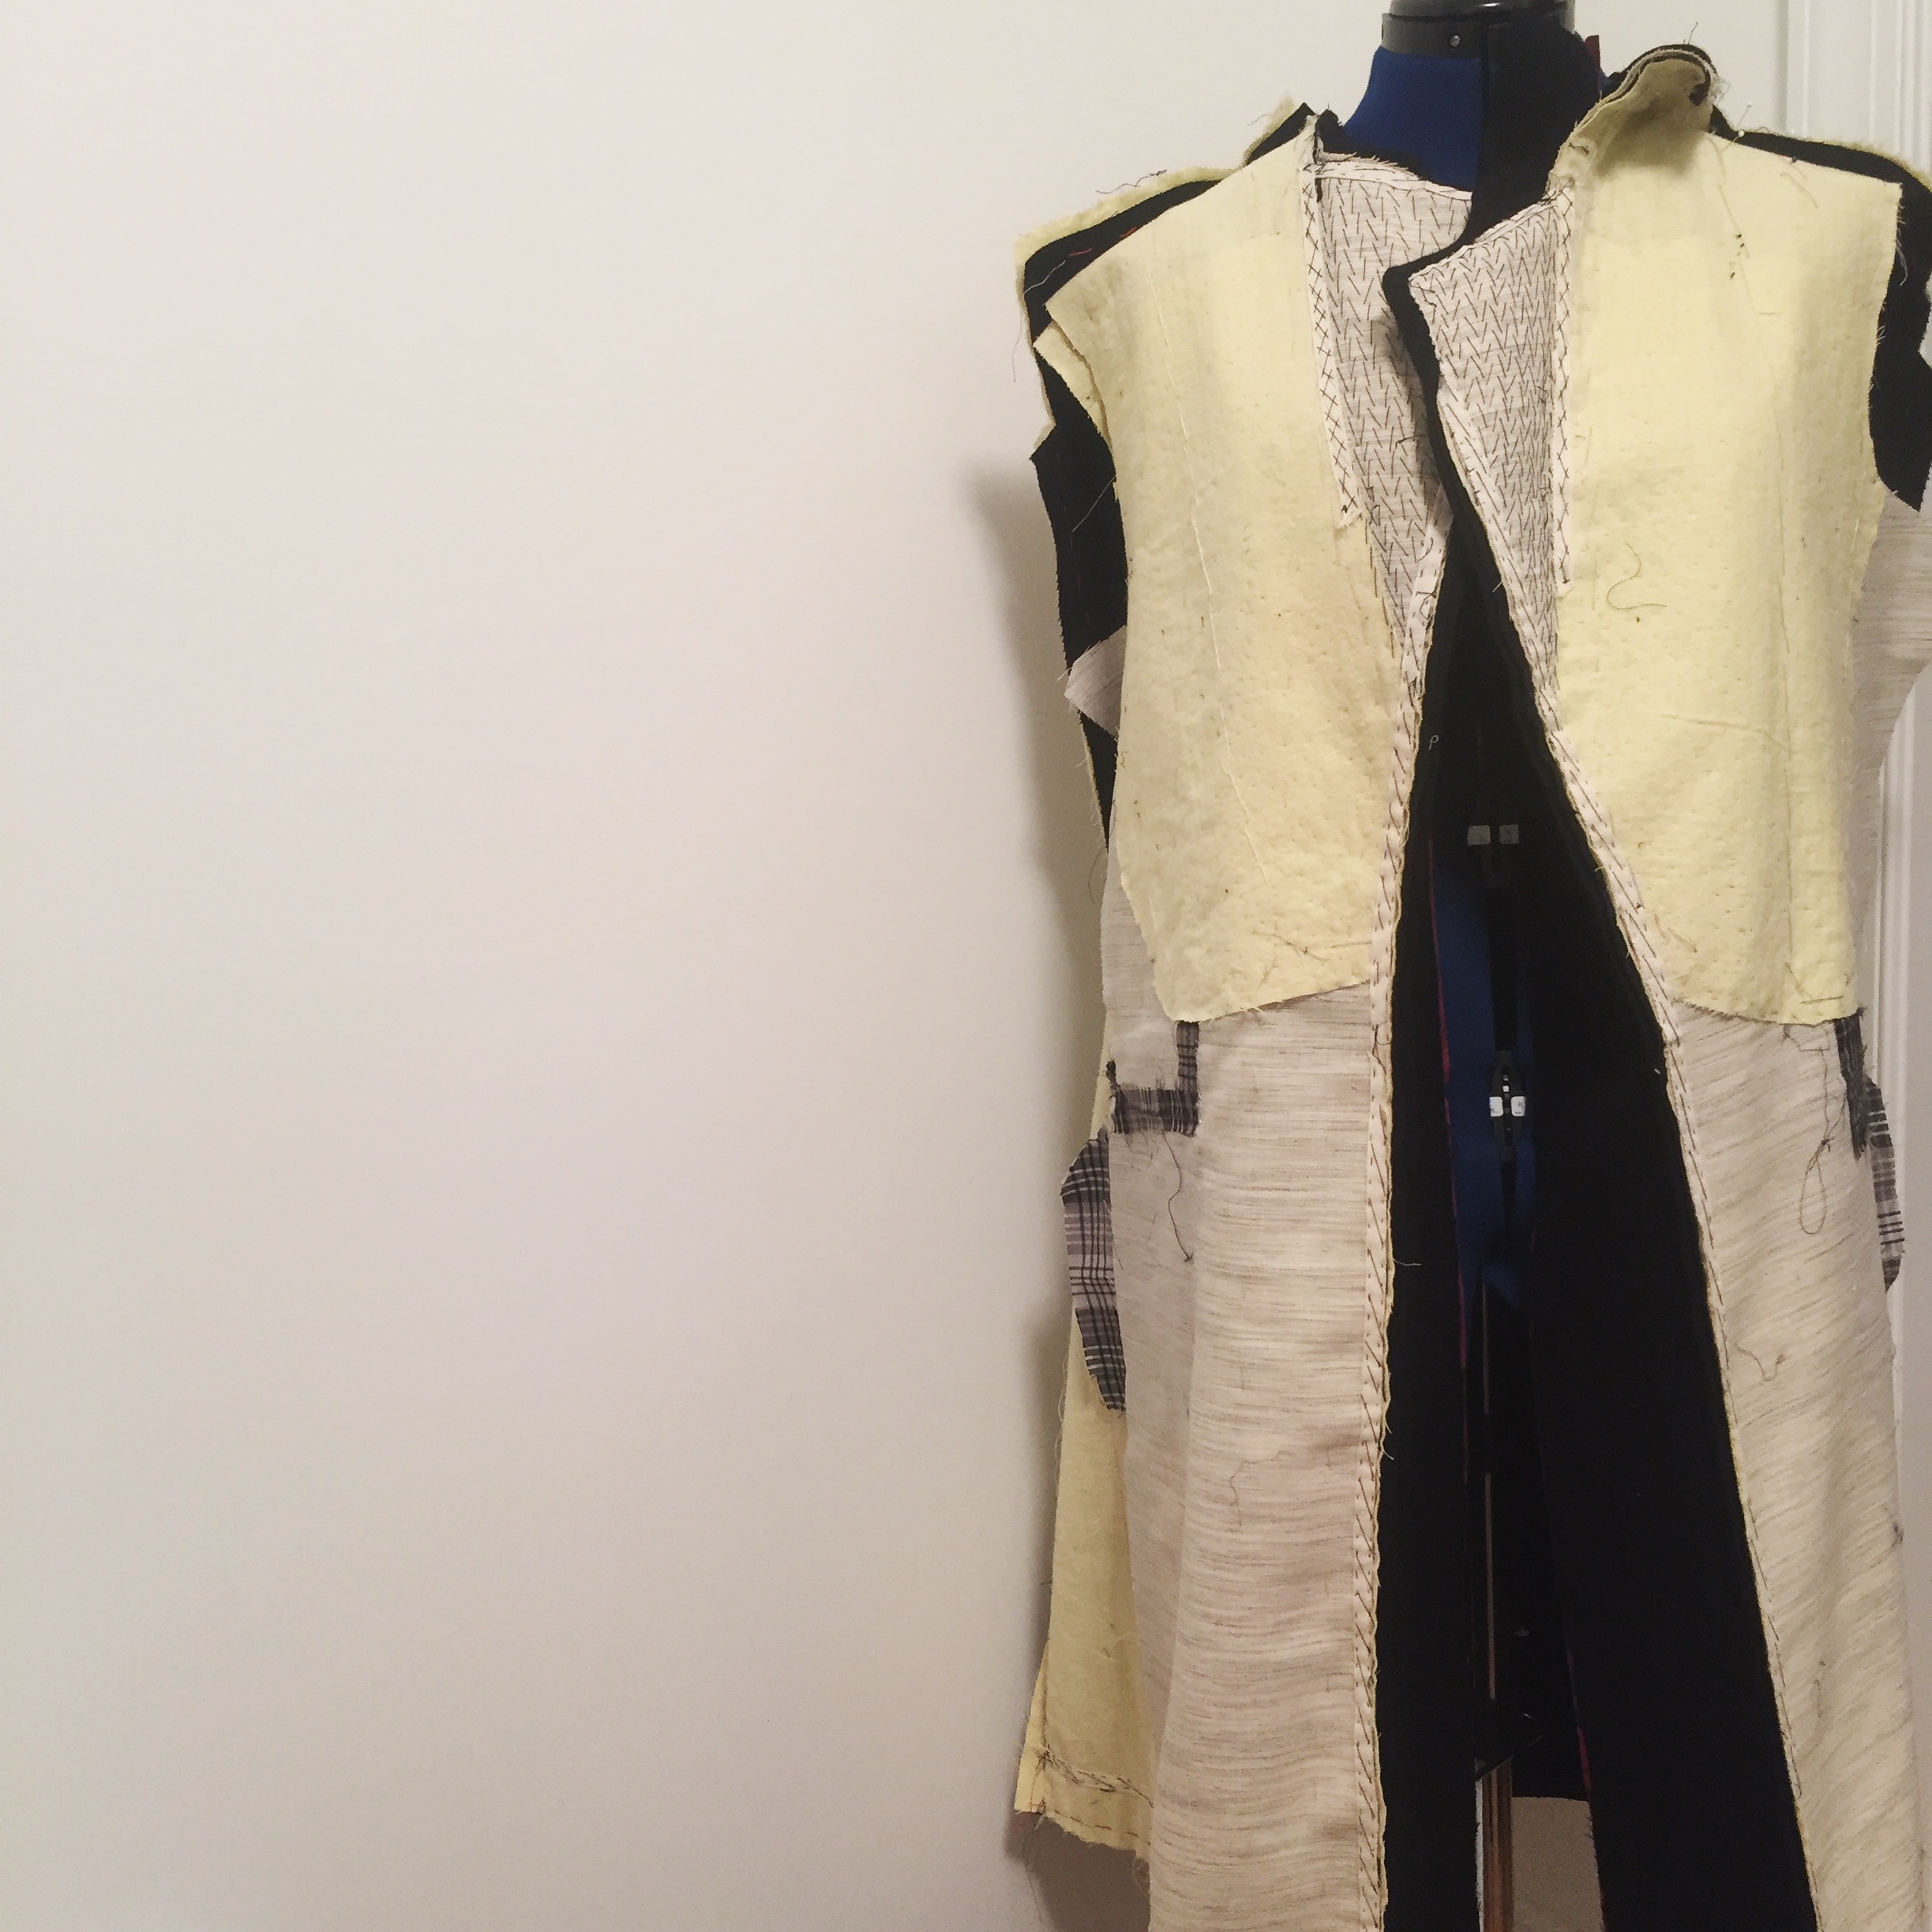
First, an observation on mens patterns: there really aren’t any.**
I really thought it would be easy to find a chesterfield overcoat. It’s like half of what Burberry sells, most of what J Crew sells and most of what I see walking around K street on any given chilly DC day.
Find me a single-breasted Chesterfield pattern. Srsly.
Anyway, I didn’t let a dearth of patterns stop me, I bought this old Burda number on Etsy. 
The observant amongst you will note that this coat is the kind of long-ish top coat that’s worn instead of a suit jacket, not over one. You want to know something that 2014 Wasted didn’t know a whole lot about? Ease. And that you need a lot of it in winter coats, particularly those meant to be worn over suits.
Fine, I made muslins, I added inches, etc. But I didn’t add quite enough before cutting out my fabric and the coat was really too tight once I basted it together and he tried it on over a blazer. I took back everything I could from all of the seam allowances. All of them. In some places, the seam allowances are currently 1/8”.
More recently, I realized the coat was too short. I’m fixing this two ways: I’m cutting a separate hem facing so that I can preserve about 1.5” in length at the bottom. And I was also going to open up the shoulder seams by about another 1/2”.
Question 1: Is it a terrible Idea to make the armhole bigger in an effort to make the garment longer? Will it eff up my sleeve setting in too much?
In opening up center back seam and (potentially the shoulders), I am making a much wider neckhole. The collar I cut out two years ago isn’t big enough, basically. I don’t have any more fabric. Luckily Dr. Wasted (Dr. Weekends? I don’t know) was on board with the idea of a traditional velvet collar, which I kind of have Morgan over at Thread Theory to thank for pointing out in the Burberry photo, so that alone can’t kill the project.

I’ve been using Roberto Cabrera and Denis Antoine’s book, and there is quite a detailed explanation for drafting your own collar once all the body fit adjustments are done. But I still have questions.
Question 2: Should I use the original seam line of the neck hole? Or, since it is now much wider, should I go into the seam allowance a bit?
And finally, I had already cut my linings out. I think I probably can’t use them anymore (except the sleeves) based on how much I changed and also because I’m extending the hem way a lot.
But. (Question 3) How on earth am I supposed to cut new linings? The pattern pieces don’t resemble the garment much anymore. Should I do something like the rub off method, kind of, to try to make new pattern pieces by tracing the current coat? (I would then draft specific lining pieces with the additional ease.) Something else? I think I read in a Claire Schaeffer book that you could technically make a lining for a couture coat just from rectangles, since you’re just sort of putting things in place and then attaching the linings at the side seams.
Which brings me to Question 4. Assuming I’m able to successfully draft new lining pieces, how many sewist/sewer points am I docked for just bagging the lining, rather than using that couture method of sewing the seam allowances of the lining to the seam allowances of the coat, cross stitch by itty-bitty cross stitch? Have you ever made a tailored coat, bagged the lining, and massively regretted it? ANY strong strong arguments for the couture method other than ‘control’? Because at this point I would happily cede control of this garment over to someone else.
Anyway, I’m hoping to get the hem sorted over the next couple of days and then I’ll have those other problems to deal with.
**Yes, I know there are some. This was a bit of hyperbole.

I figure if it all looks good in the end, it’s a win! You’ve got a few questions here. Unless I am reading wrong, this is what I would try for myself.
I would not like to make my armhole bigger in any garment – if it fit me. I would prefer to add length in the waist or in the hem. Especially, if there is nothing wrong with the size of the coat, just the length.
The lining is suppose to be an exact copy of whatever you outside/fashion fabric is, otherwise it won’t fit.
When I am copying I use tissue paper and trace the original fabric, cut out the tissue paper and then cut the lining fabric, don’t forget seam allowances.
So far, I’ve always bagged the lining, even on suit jackets. If I wanted to hand sew and make a couture jacket, I would, right now I don’t want too!
And like I said, if it all looks good in the end, it’s a win. No one is going to know what you did during construction. There are just going to say “Dude, what a great coat!” I’m looking forward to seeing your next steps!
Thanks so much for your note. I think that I’m going to have to copy the coat pieces with some tracing paper with wax paper underneath to get the new shape before adding in the extra ease.
And you’re right about most people not knowing my construction sins. I just sort of set out to do it right and haven’t so far achieved that.
I’m sure it will all come together. I always have to think of it in pieces. And as if it isn’t a lined coat but just the same as making a shift dress, then the next step of attaching a collar or sleeves. One step at a time! You’ll make it!
Well, you know that I don’t have much wisdom to offer in the coat department (and even less in the couture sewing department), but I can offer moral support! I’m thoroughly impressed by your perseverance and skill. I wouldn’t even have known where to start with alterations after cutting and would probably have thought about how to turn the wool into a skirt for me instead. Also, since it’s all kind of experimental now, why not just go with your gut regarding the lining and the collar drafting? Sometimes when the “perfection” pressure is off it’s way easier to just be creative with it. Then if you or your husband really hate a bagged lining, you’ll know for next time? I’m excited to see how this goes (and ends up)!
Thanks so much about the moral support. I laughed at your figuring out how to turn it into a skirt for you instead!
I’m cutting out linen today for some napkins but am hopefully getting to the hem acting a bit later, and then I’ll know a bit better where I’m at.
that is quite a project and that’s a tough one regarding the fit and wanting it to be more of an overcoat. For the collar I would not redraft, I would slice open the collar at the center back and shoulder points and insert to widen/lengthen the equivalent amount that you add by sewing the seams smaller. it should match the stitching line on the coat as you have it adjusted.
For the top of the sleeve you can easily add some height at the sleeve cap and ease that in with wool. it will work.
for the lining – use the sleeve pattern, and then use the back piece( don’t forget to add a few inches at the center back for a nice big pleat.. for the lining front you can easily make a front lining by overlaying the front facing piece on the front coat piece and subtracting that part, be sure to add a good 1-2 inches at the seam allowance. In fact I think a lining should be a little bit bigger than the outer garment, it needs the room to shift around a bit as you put it on and off, and also for wearing ease. Usually the outer fabric (wool) is more malleable but a lining fabric has no give. so I sew the lining with 1/2 seam allowance and then if the coat is 5/8″ seam allowance it will work out. Lastly for the question of bagging the lining – I never do it, I think it is fraught with difficulty and I just stitch the lining in by hand, and put small pleats in if it needs it as I go around the facing. Hope some of this helps !
That’s all superhelpful, thanks. Especially the part about cutting the collar open and adding in the extra width rather than redrafting. I did have a bit of a pit in my stomach about the idea that the lapel and collar might not match up if I redrafted, so this helps take care of that.
Same goes adding in more of the sleeve cap height. It makes total sense, but I don’t know that I would have thought of it.
There are pretty good instructions in the Cabrera book about how to draft a lining pattern from your original pieces in order to make it suitably bigger. I’ve actually done that before so am not too stressed about that idea. I just wasn’t sure if how to get the ‘new’ pattern for my coat. I think laying it on top of some wax paper and tracing paper and then tracing the seam lines is the only way it’s going to happen.
I like your hack of sewing a lining with a smaller seam allowance, though. That sounds like the smarter easier way to do things for projects that aren’t quite this fussed over.
I’m really amazed you put all your linings in by hand. I must have no patience because that hand stitching can drive me bonkers!
Good job so far with that coat! As a trained men’s tailor I can only agree with Beth of Sunnygalstudio. Great advice. I just want to add that you may have to change the overall shape of the collar, as it now probably will leave a wide gap around the neck. Make it more flat to sit closer to the neck. And on the subject of lining, don’t even think about bagging it!! It’s a horrible method that gives no control and shape. And there’s no need, the lining of a tailormade coat is never attached at the bottom. With wear (sitting) the lining and the coat both change shape, and need to hang free. You must hem both separately, and most important, crosstitch the inside edge of the lapels to the inside of the front to make them stay put. This step is crucial and can’t be done at all with bagging, so skip that idea all together. Good luck! Tina
Ohhhh your comment makes me groan about having to stitch the lining all in, but if there’s any project where I should be following the correct methods this is it.
One question: How would you go about changing the shape of the collar to be more flat? Do you mean to flatten out the inner curve of the collar? Or the outer curve relative to the inner curve?
Thanks of your help, it’s really much appreciated.
Hello again! I’m sorry for just disappering like that, life got in the way, sort of. Happy you liked my advice!
Maybe you have it all done by now, but here we go: First, the lining is sewn to the inside lapels and facing along the front, with the sewing machine. So the handstitching is for the neck and the sleeves only! The linings hem can be machine stitched, just like a free hanging skirt hem. You make half a bagged lining you can say…
The collar, thats tricky as h**l. Baste the one you have in position, it may fit!! But if its too wide you need a total redraft.( It would look like its for a massive bodybuilder, lots of room around the neck.) in that case, pinch and pin it in to closer to the neck, along the foldline. This will give the new shape. The inner/under edge must stay the same, the outer must lie flat. Its the foldline only that needs to get tighter. If there isn’t a seam already, you need to create one. Cut the old collar apart and use as a new pattern. Honestly, make it collarless, or add a bulky scarf sounds easier 😉 if it looks too crazy! To remake a collar like that is no walk in the park!
Good luck/Tina
I feel like I’m sitting on the sidelines of an awesome performance, observing the expert opinion of these ladies who have commented! Good luck!