
Let’s dust off this old blog here, shall we? Truth is, there’s been a lot of making going on in this now efficient sewing room the last few months. Just not a whole lot of writing about it.
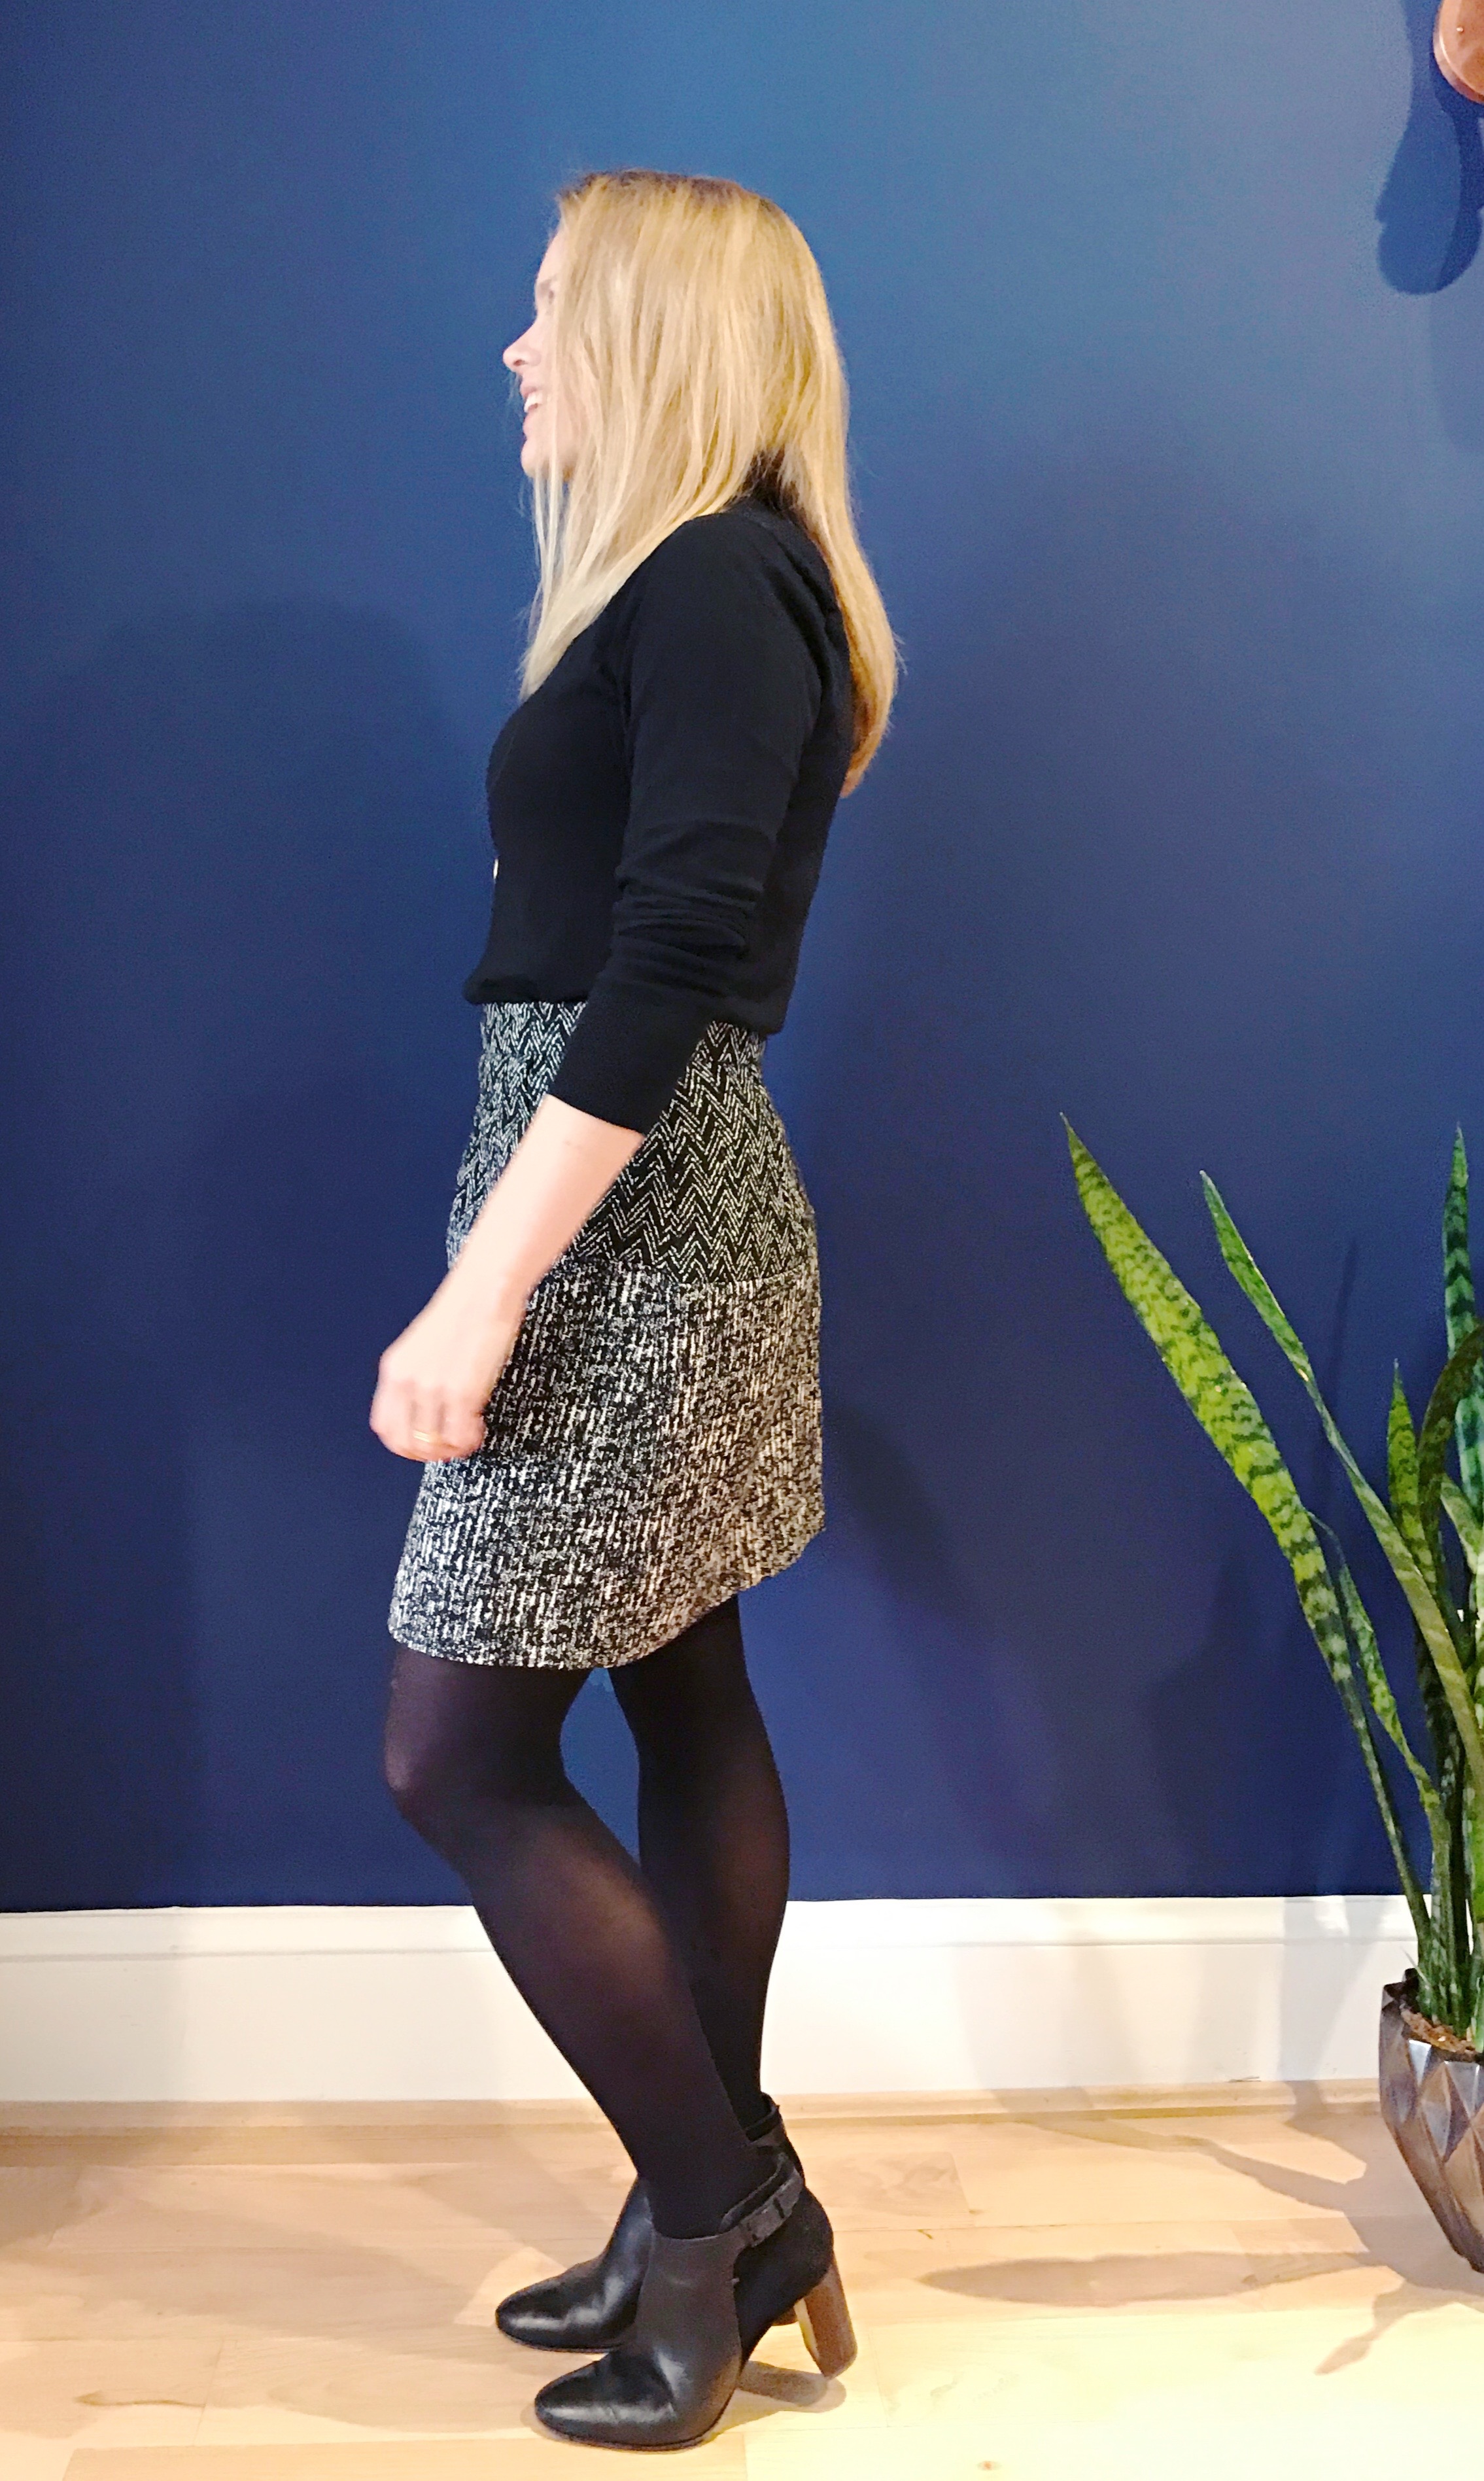
To kick things off, a skirt I loved and wore the ish out of all winter: a wool-blend jacquard Vogue 1247.
Man, winter light, eh?
Anyway, this is a well-loved but out-of-print Rachel Comey pattern. It’s been reviewed lots, so check out Pattern Review if you are thinking about making it and in need of some guidance. In terms of pattern adjustments I made:
:: I used a size 12 based on finished garment measurements. There was much less ease built into this skirt than normal with the large commercial pattern companies (something I’ve read is normal for the designer patterns).
:: I removed the pockets, even though I like that feature on other people’s skirts. Spousal disapproval and all. I think he asked “Why are you wearing an apron?” when I showed him the muslin of the skirt with the pockets.
:: I added 1.5″ of length to the skirt front and back. Because oh baby is it a mini skirt. I’m only 5’3″.
:: In order to account for my special combination of boyish hips and gymnastics-and-squats-trained glutes, I slimmed the hips but added room in the butt area through the following combination of moves:
- cut size 12 at top of the front and back yokes (near my waist), tapering to a size 10 at the hip, thereby shaving off 3/8″ at the side hip
- cut size 10 front and back skirt portions so they would line up properly with the bottom of the yokes
- on the now modified back yoke, did a 6/8″ full butt adjustment, thereby transferring the shaved-off circumference from the hip area to the butt area
- using a size 10 back skirt piece (so that its side seam curve would line up with the front skirt curves) liked it open and added 6/8″ parallel with the grain line on each side, so that its width would correspond with the newly adjusted width of the back yoke.
It ain’t bad, though I do think my full butt adjustment could have been a bit smaller (like maybe just 1/4″?)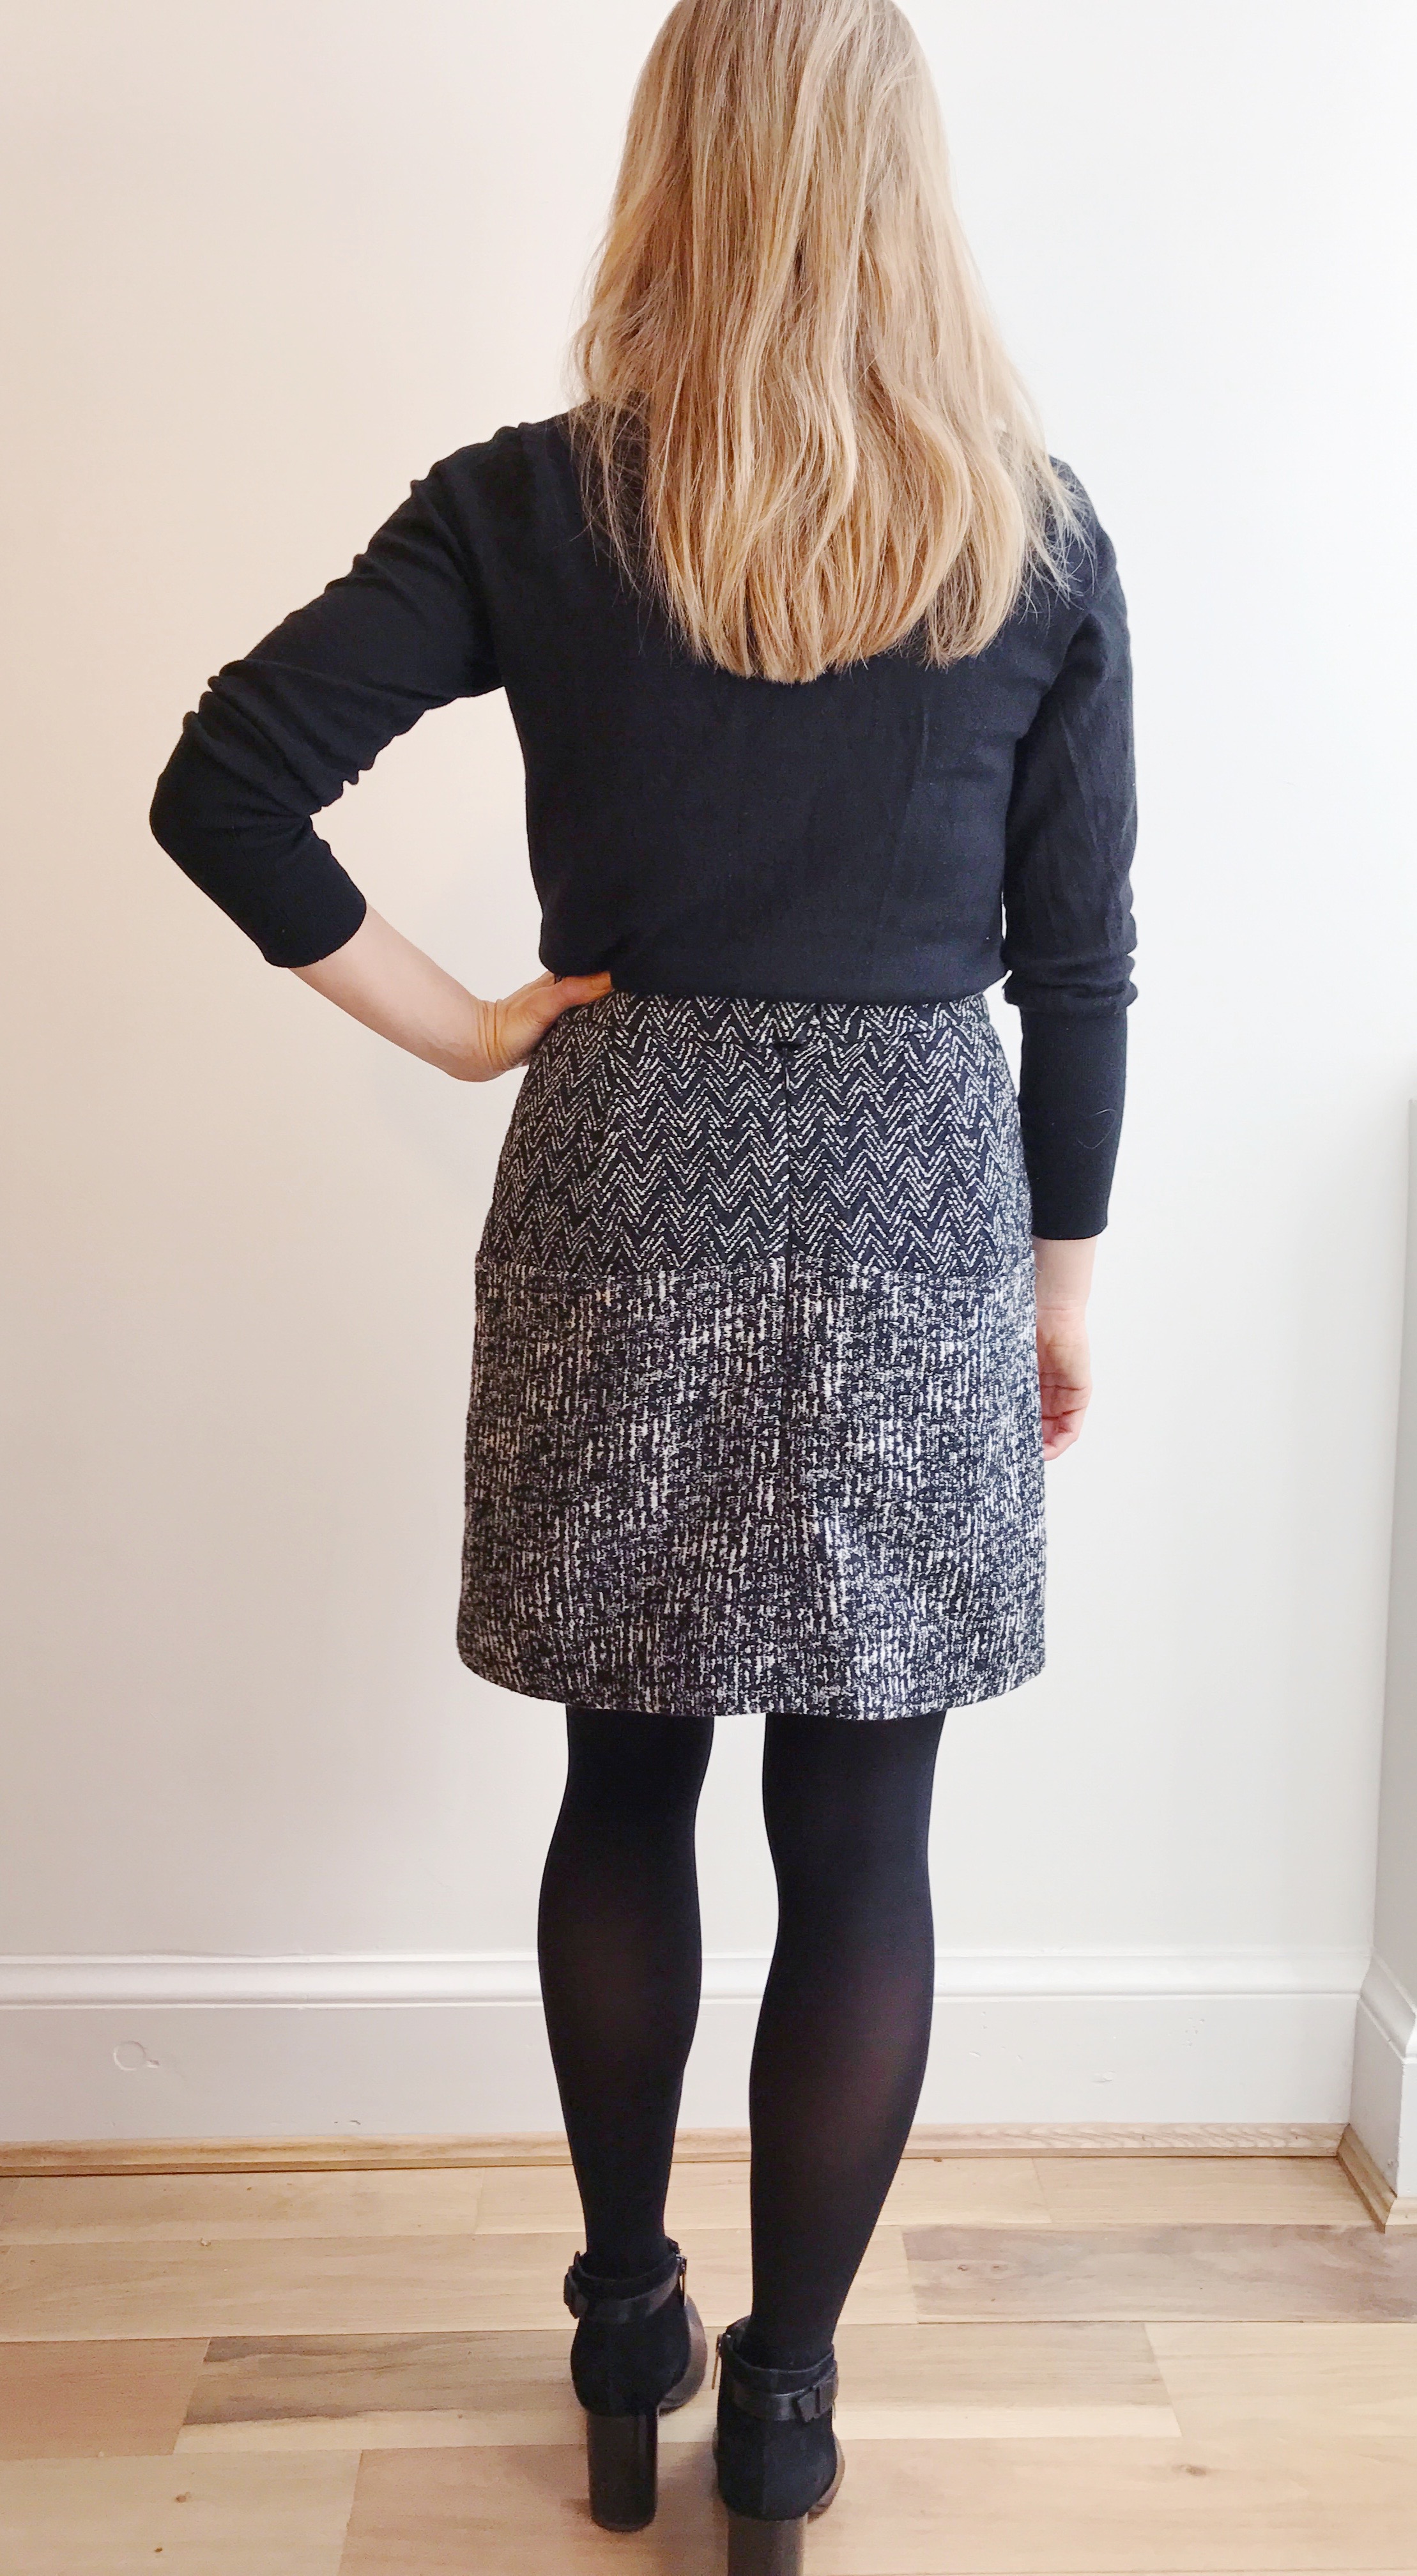
For construction!
:: I used this wool-blend jacquard from Emma One Sock. It’s not obvious it was cut from one length of fabric, but it was! This was made a continuous length with the two different weaves each about 1/2 yard. I used one weave for the yokes and the other for the skirt.
:: The weave was loose so I underlined things with silk organza for stabilization. (Yeah, things got fancy pretty fast.) Hand basting visible below. So are the serged seams allowances, because I was already grumpy enough about hand basting that I wasn’t about to start catch stitching seam allowances. We don’t need to go full couture here.

:: I then lined it with some super ugly brown silk charmeuse that was cheap and has been fantastic for hidden linings. I did install that by hand, because it just seemed easier than trying to wrangle with a sewing machine, particularly around the invisible zipper. I did make one kind of big mistake and sewed the flat side of the charmeuse facing the body in the back yokes. But I’d already serged the seam allowances and I’m not crazy enough to sit there and unpick serger seams. Sort of visible here: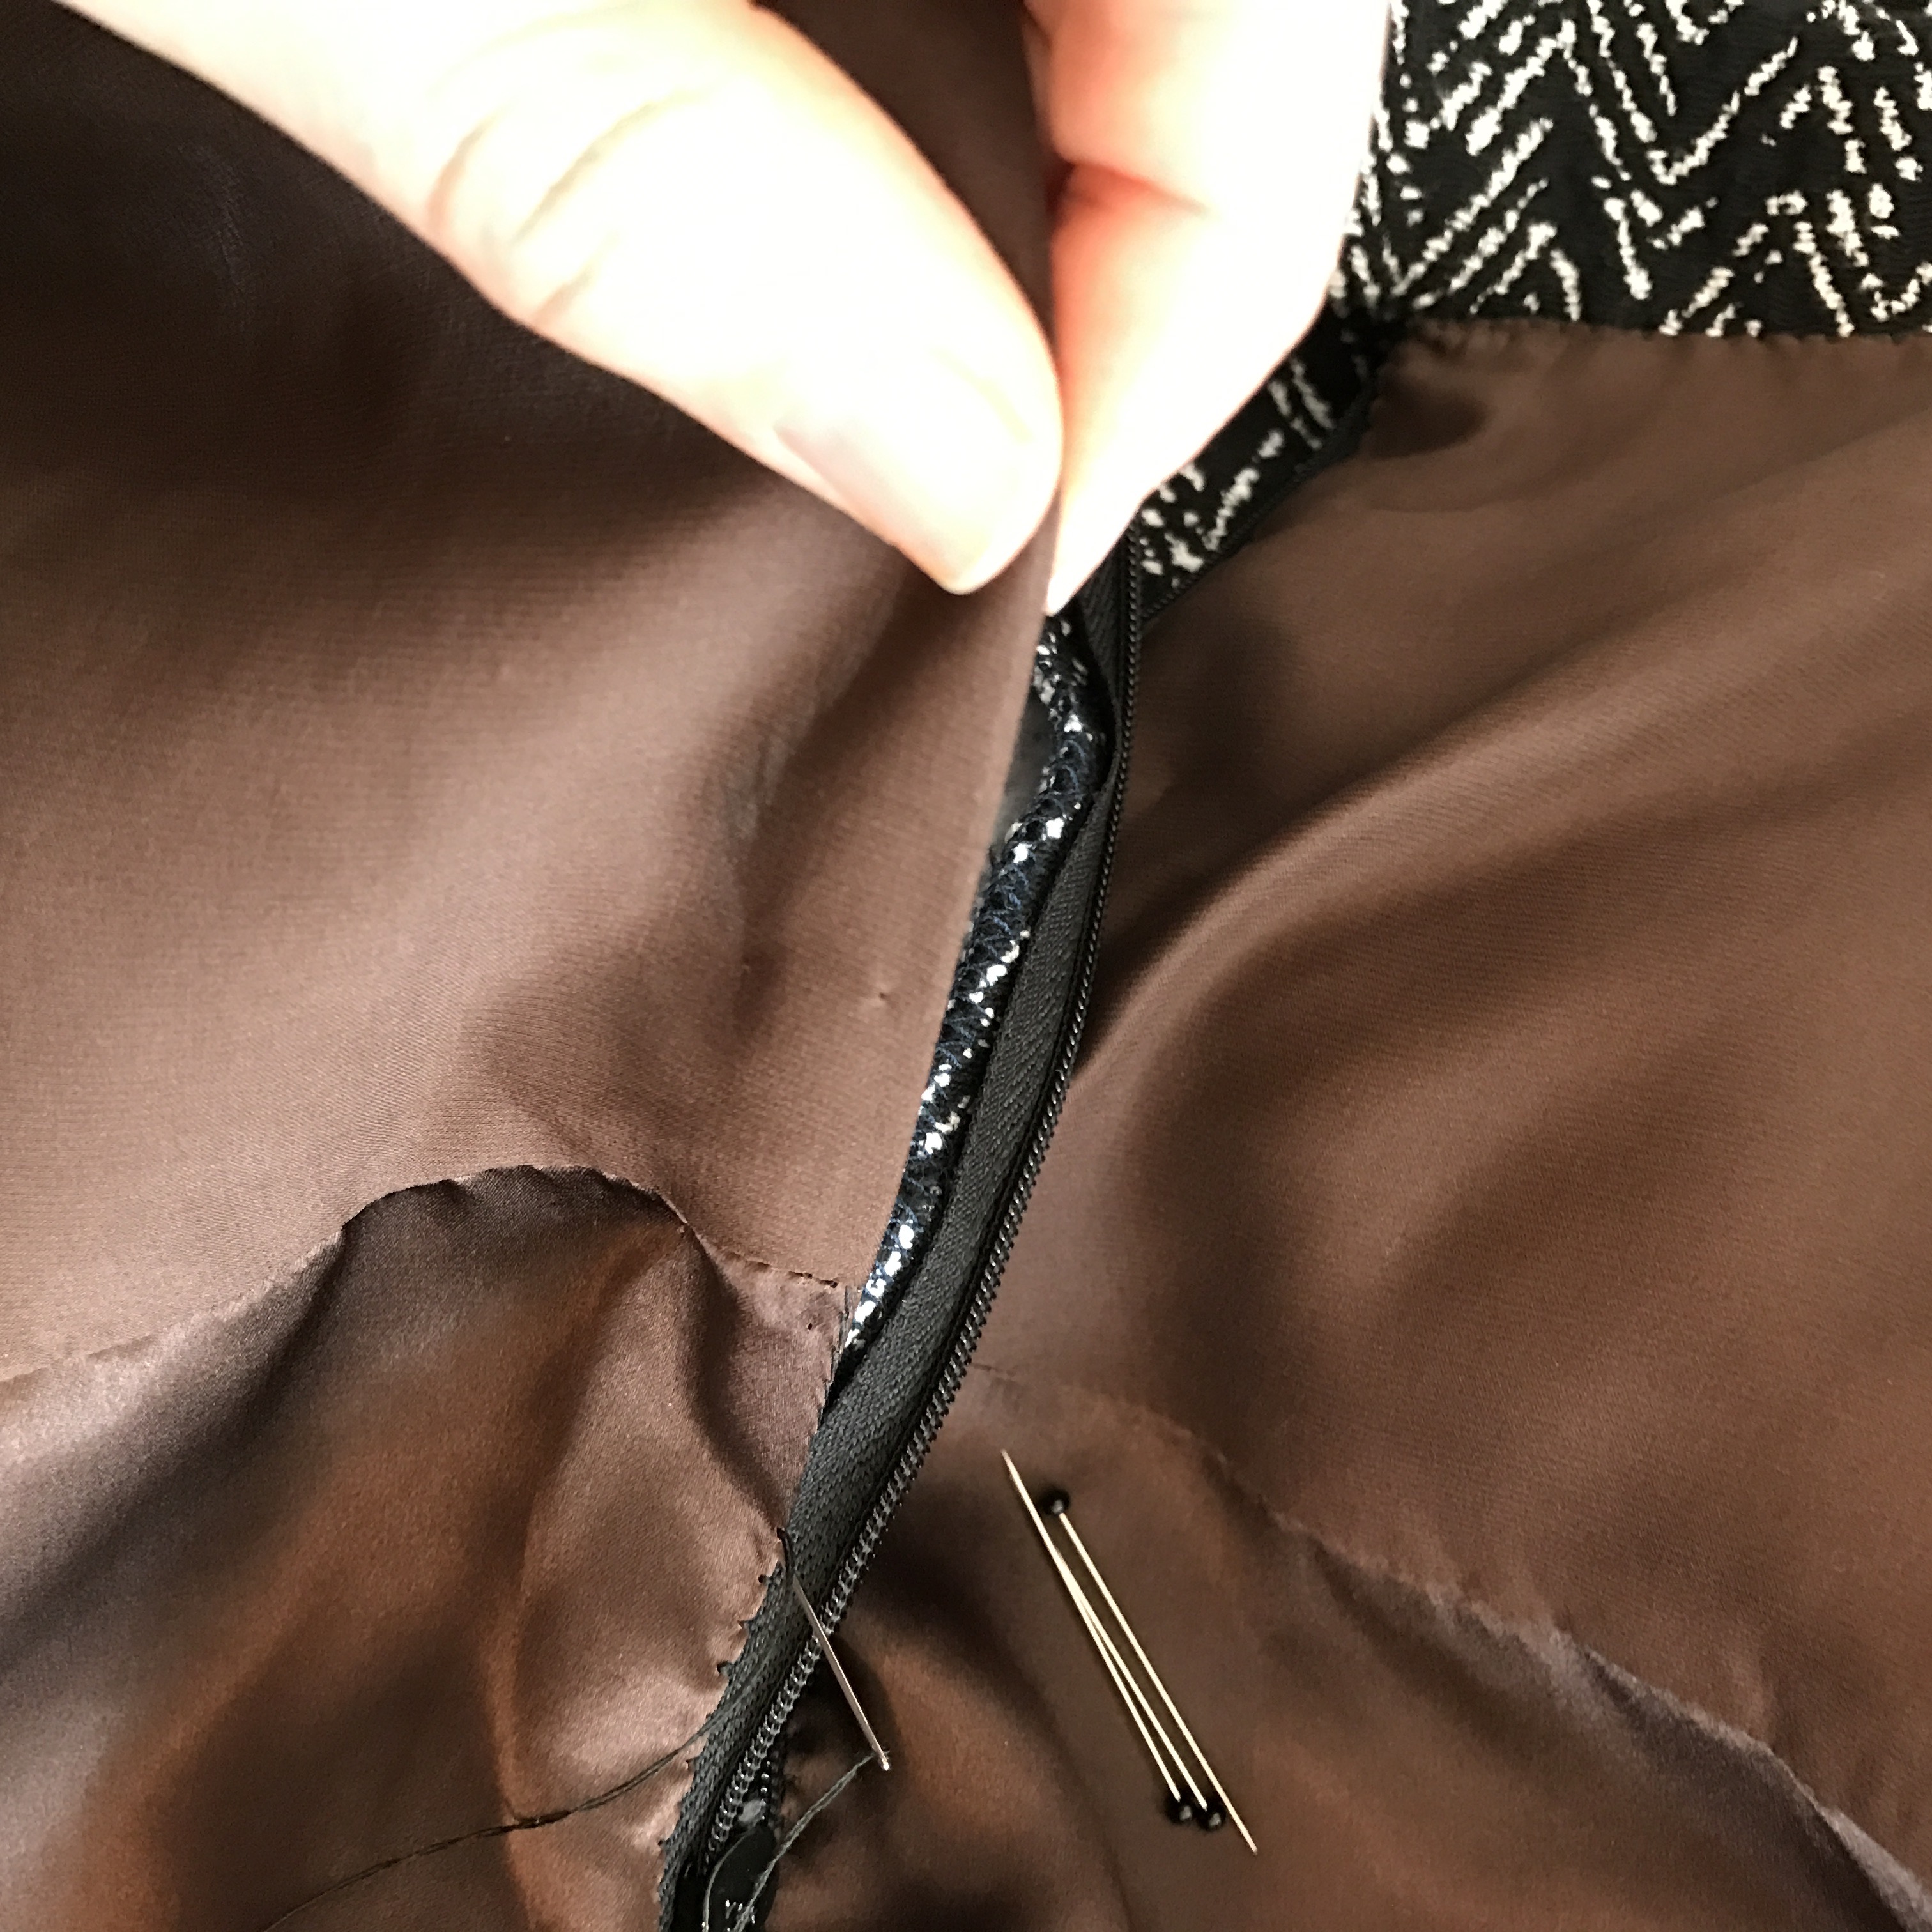
And that’s about it!
Other than: I made a second skirt out of some stretch cotton twill I got from Mood. It generally looked like this (mirror selfie!) and was underlined with some stretch polka dot silk charmeuse that’s been burning a hole in my stash since I started having a stash.
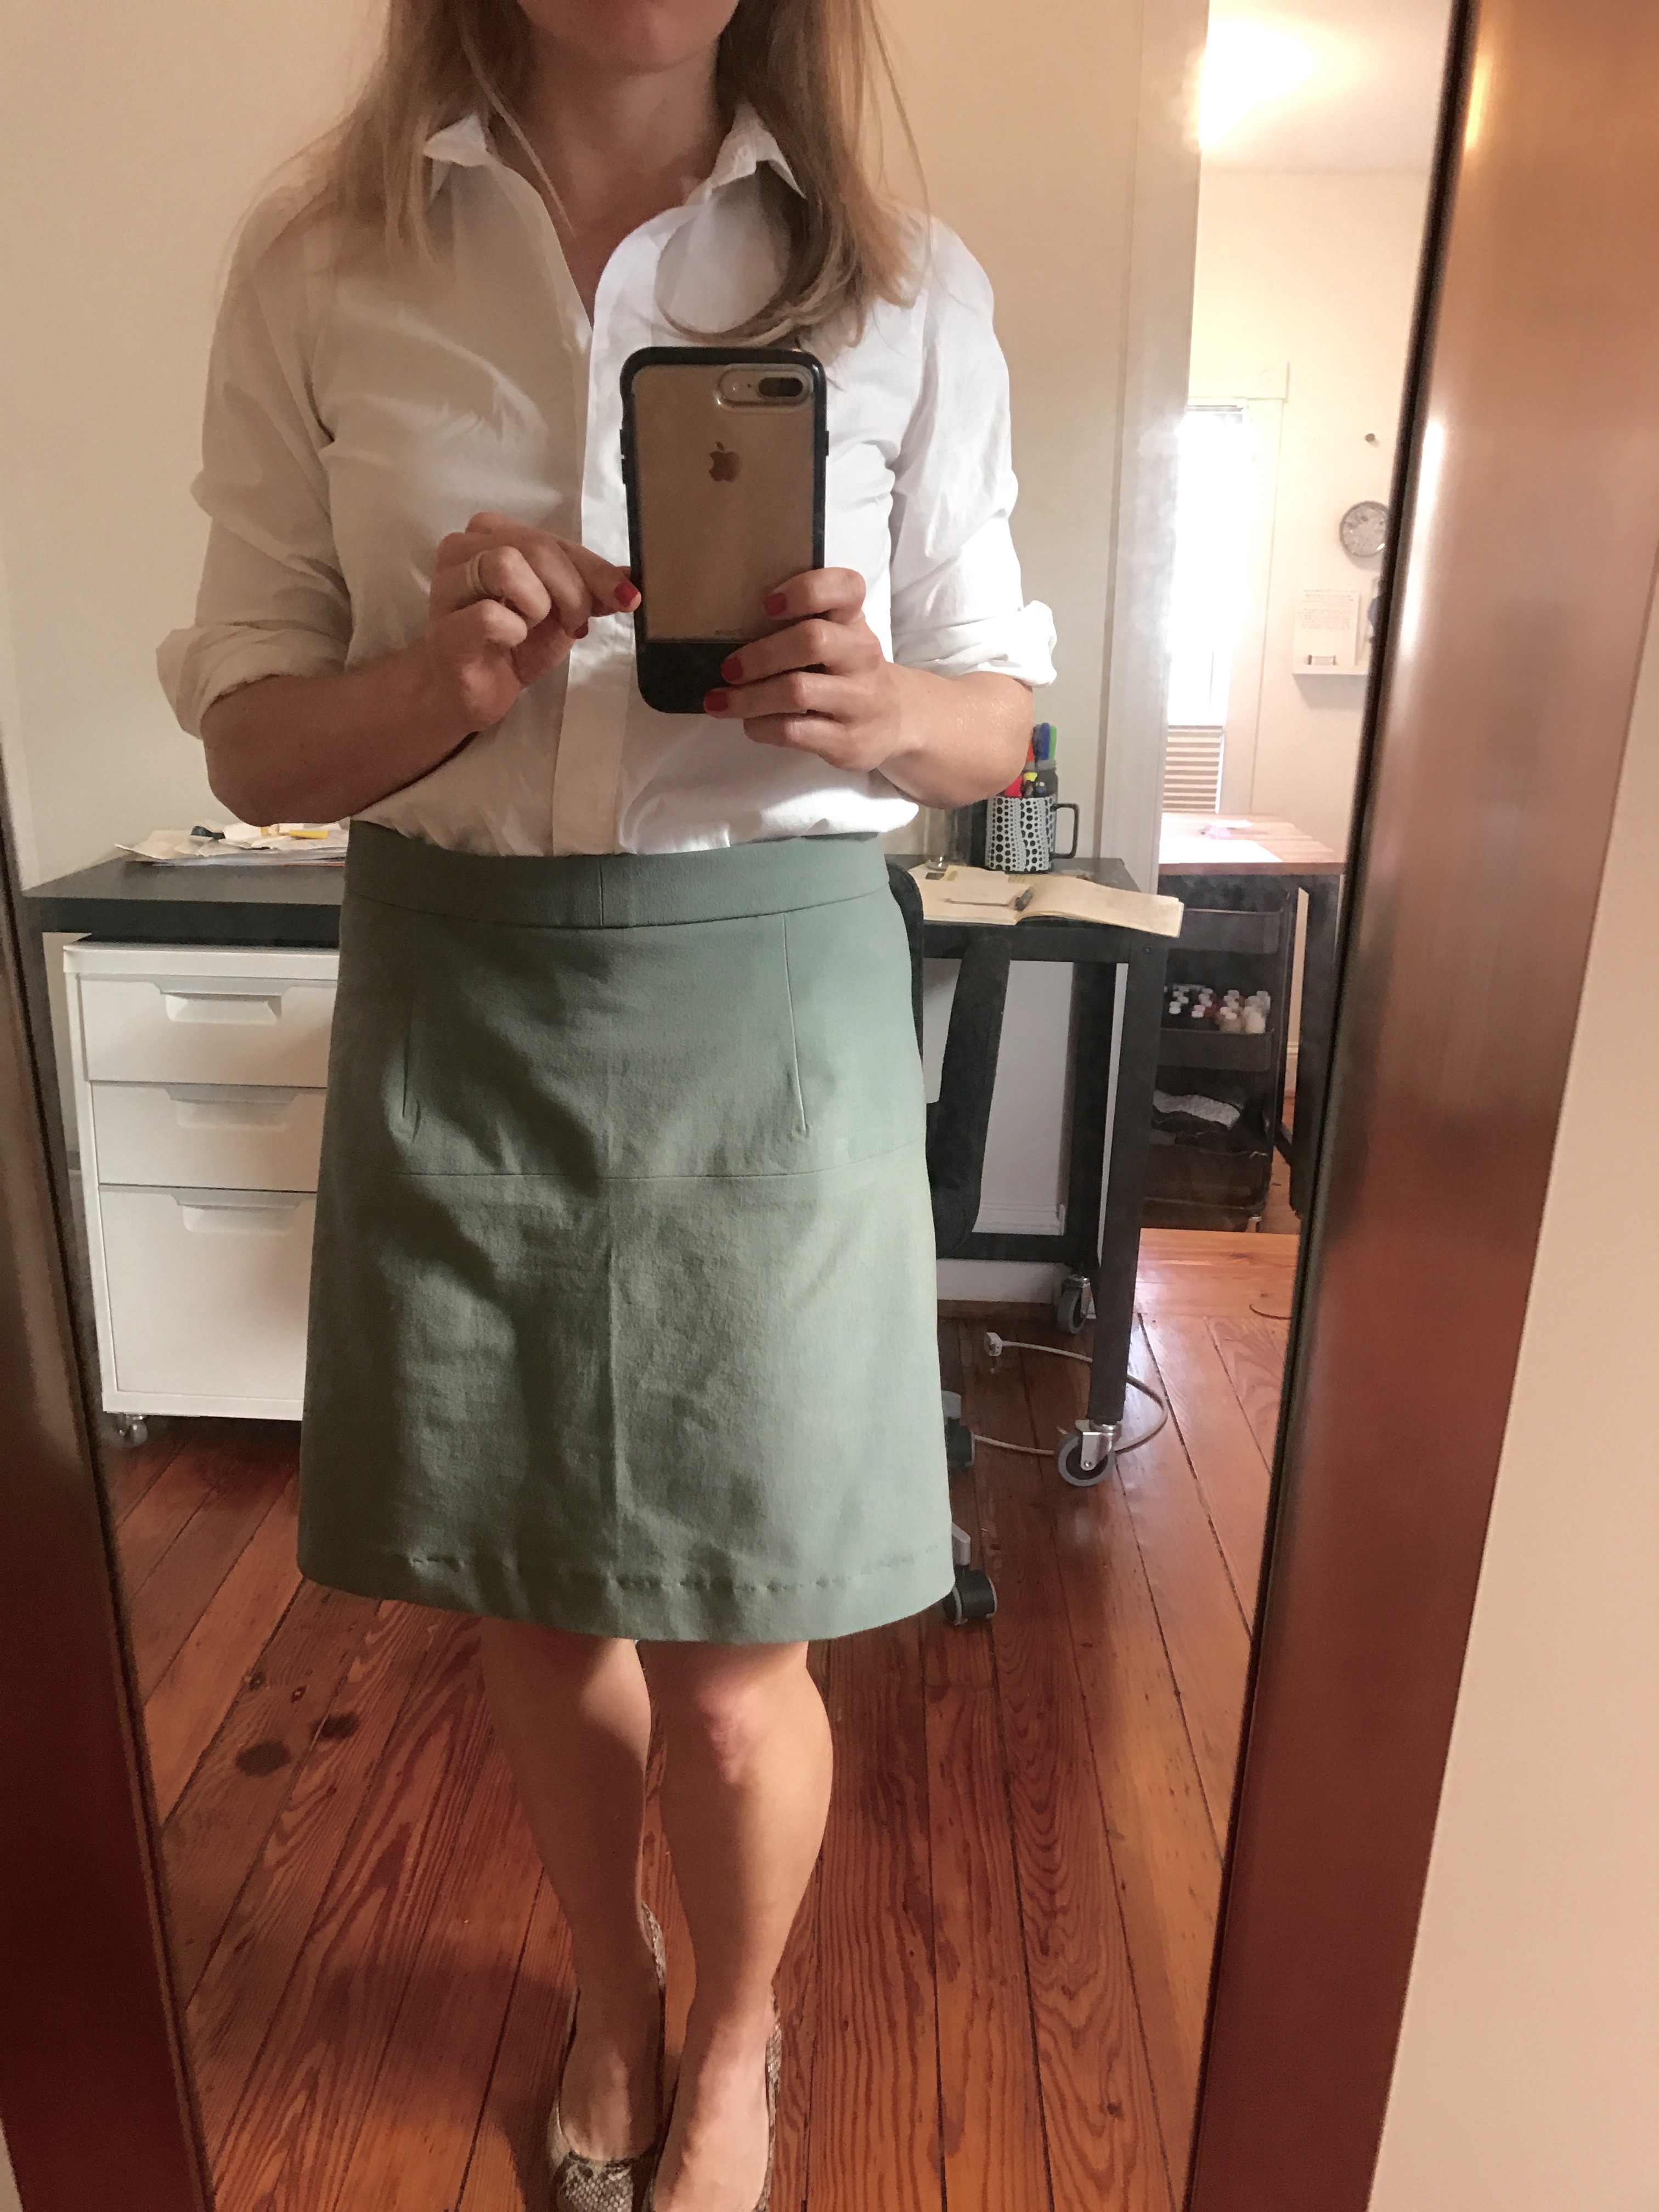

I liked it well enough and wore it several times (waiting for a time to take proper photos when the stars aligned for it to both be light outside and my photographer not to be working). But. Then I washed it the interfaced waistband got maaaaaaaaaangled, and it’s been sort of a loss since then.
SaveSave

Very nice! That wool blend is really cool, especially as a skirt. (I also have SERIOUS shoe envy over those ankle boots–DANG.) Don’t feel bad about the lining “oops,” I did the SAME thing lining a skirt a couple of months ago. Serged and everything. I wasn’t about to undo it either, LOL. Even the flat side of a lining fabric is nice and slick, and nobody will see it. 😉 But that waistband interfacing snafu is a huge bummer: I’m sorry that happened. Been there, done that with a few shirt collars; I’m trying to get away from fusibles as a result. Can you redo the waistband, or is that skirt just dead to you? (Which would be understandable!)
THANKS. I waited a whiliiiie to buy those shoes (Aquatalia) hoping they would go on sale but panic purchased when the stock got super low.
It’s funny about the interfacing. I mean, I guess I treat my fabrics like shit before I cut them (hoping that if I screw up in washing, which is inevitable, it won’t be the fabric’s first rodeo), but I never really pretreat interfacing because I am lazy. After this experience I was thinking of stashing some stuff from Fashion Sewing Supply (they claim you don’t have to pretreat), but I don’t know if it would be any better. Do you have any experience with their lighter stuff?
I actually think Beth’s rec of just installing a waist stay below is the only way I’ll end up mustering the effort to salvage. But it’s gonna be a while if that happens.
I haven’t used the FSS interfacings but I have heard good things; I haven’t heard anyone say that they needed to pre-shrink, only that you definitely need to follow the instructions that come with it.
Beth’s idea sounds like a great way to make that skirt wearable again, but I totally understand that it’s not something you’re eager to go back to yet!
that skirt is super cute and looks like it will be a wardrobe workhorse – for winter! (makes me hot just to look at it)
By the way, after my first version of that pattern I made subsequent versions without the waistband, instead I created a facing so it is one of those ‘waistband-less” skirts which I find more comfortable. Perhaps you can remove the waistband in this way? here’s the link http://sunnygalstudio.blogspot.com/2013/01/vogue-1247-best-skirt-pattern-ever.html
I remember your versions! I read your write-ups pretty thoroughly before executing the first go. I actually never thought to just slice the waist band off after the fact, though, and was just grumpy at the idea of maybe having to replace it. I think it might work! Just for when I get up the gumption to re-tackle a project.